


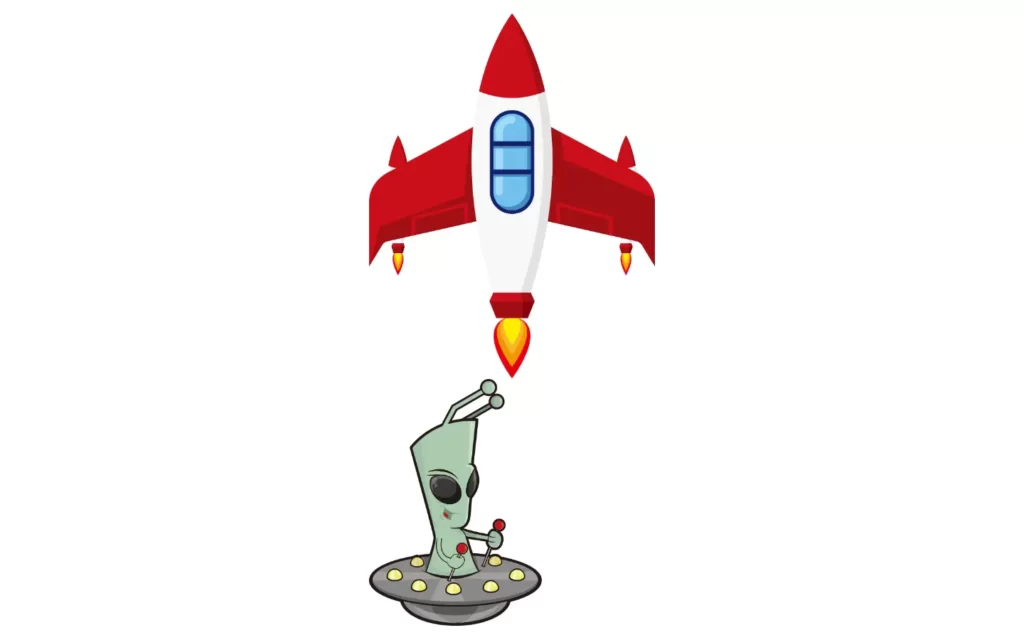
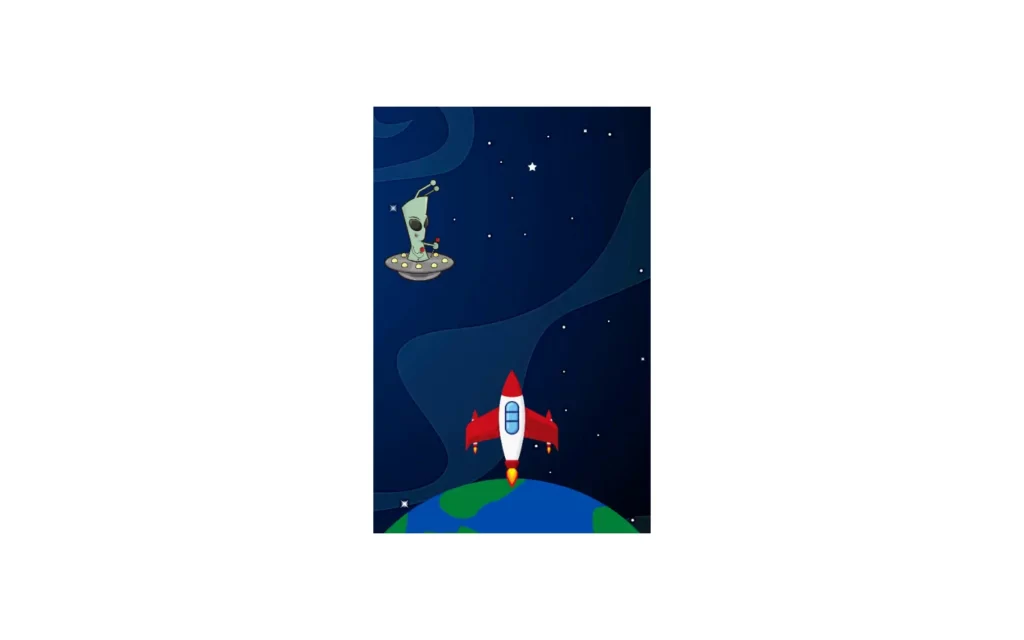
In today’s article, we will create a space war game with HTML, CSS and JavaScript. This game will be pretty fun to create, of course it is a small game, but I’ll make sure that you will learn too much with this project. This game will have some enemies and a player, player have to take down every enemy, if player misses the enemy, and it reaches to player then game over. Pretty simple logic to understand if you have played this kind of games before then you’ll have better idea.
Pre-requisites to Make Space War Game Using HTML, CSS & JavaScript
- Good knowledge of HTML
- Good knowledge of CSS and CSS3
- Good knowledge of JavaScript
Creating HTML Markup & Default setup
<!DOCTYPE html>
<html lang="en">
<head>
<meta charset="UTF-8">
<meta http-equiv="X-UA-Compatible" content="IE=edge">
<meta name="viewport" content="width=device-width, initial-scale=1.0">
<title>space war game</title>
<link rel="stylesheet" href="style.css">
</head>
<body>
<div class="game" id="game">
<div class="player" id="player"><img src="pngegg (2).png" alt=""></div>
<div class="alien" id="alien"><img src="alien.png" alt=""></div>
</div>
<script src="main.js"></script>
</body>
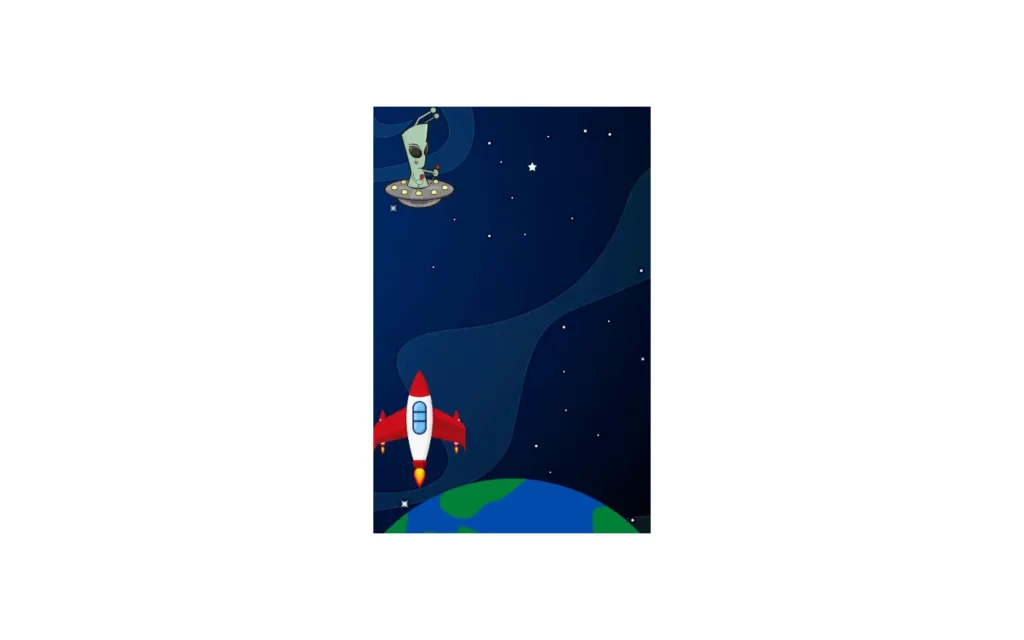
</html>First of all, let’s build an HTML file and use exclamation(!) mark in Visual Studio to build default markup. Here we have included our CSS and JavaScript files, then after in body part we have made a div which contains player and alien image which will be very large by default, So let’s adjust with CSS.
*{
    margin: 0;
    padding: 0;
}

body{
    display: flex;
    justify-content: center;
    align-items: center;
    min-height: 100vh;
}
In CSS, We have set some default values like margin and padding to 0, and also we have centered our content using justify-content and align-items, again we have here min-height of 100vh which means our will have minimum of 100 view port height.
Styling and Customizing The Images
.game{
    width: 390px;
    height: 600px;
    background-image: url('spacebg.png');
    overflow: hidden;
    position: absolute;
}

.player{
    width: 130px;
    height: auto;
    position: absolute;
    top: 370px;
    left: 0px;
    text-align: center;

}
.player img{
    width: 130px;
    height: auto;
}

.alien{
    width: 130px;
    height: auto;
    position: absolute;
    top: 0px;
    left: 0px;
    text-align: center;
}
.alien img{
    width: 100px;
    height: auto;
}
Firstly, we need to add a background image in-game which have a width of 390px and a height of 600px. Also, overflow should be hidden, so the image won’t come out of the game div, and we need absolute position here.
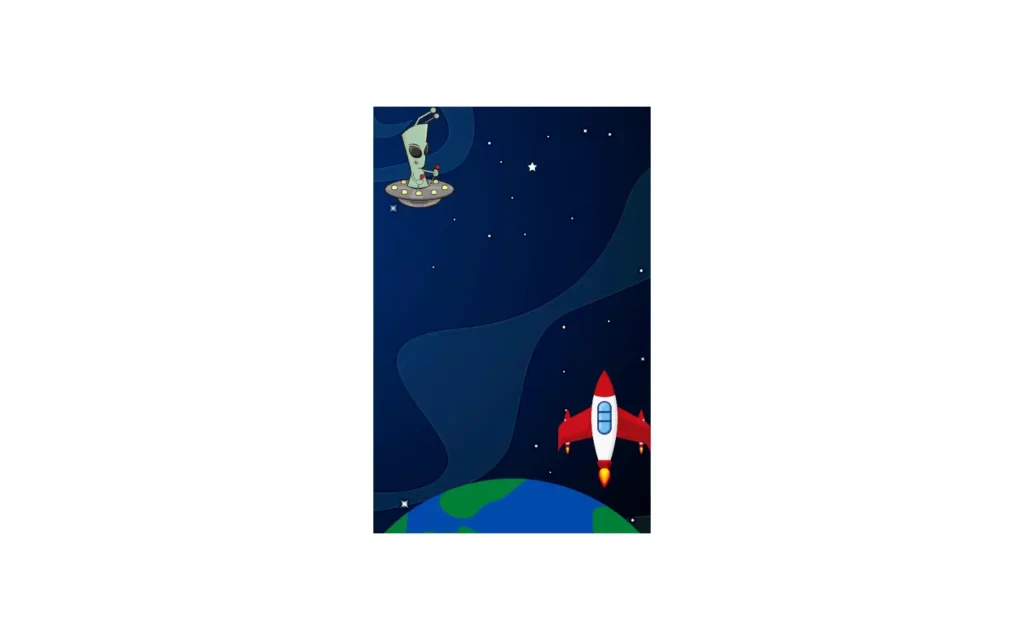
Now we have a player whose width should be 1/3 of the game container’s width because we need our player to move in three sections left, right, and center, So we have 130px width. Then we need to position our player, for that we will give the top 370px, so the player position will be 370px down from the top.
The same styling for the alien as our player, we just need our alien a little bit smaller than the player, let’s say 100px of alien width.
Player Movement
const player = document.getElementById("player");

window.addEventListener("keydown", function (e) {
    if (e.keyCode == "39") {
        var playerRight = parseInt(window.getComputedStyle(player).getPropertyValue("left"));
        if (playerRight < 260) {
            player.style.left = (playerRight + 130) + "px"
        }
    }

    if (e.keyCode == "37") {
        var playerLeft = parseInt(window.getComputedStyle(player).getPropertyValue("left"));
        if (playerLeft > 0) {
            player.style.left = (playerLeft - 130) + "px"
        }
    }

})
Now, let’s move to our main part, JavaScript, first we can fetch the player element using document.getElementById(“player”). Then we need to add an event listener on key down, we will use here key codes as we have here keycode = 39 which refers to the right arrow key of the keyboard, Now we can fetch the player position using window.getComputedStyle(player).getPropertyValue(“left”) function. With this, we can get some value, and we can turn it into an integer using parseInt. Note here we have to get a position with respect to left.
After that, if the player position is less than 260 then we will increase it by 130px, and again if the player position is on edge then it won’t move because we have an overflow to hidden.
Same logic for keycode 37 which is our left arrow button, we just need to change the condition if the player position from left is greater than 0 then we will decrease the position by 130px.
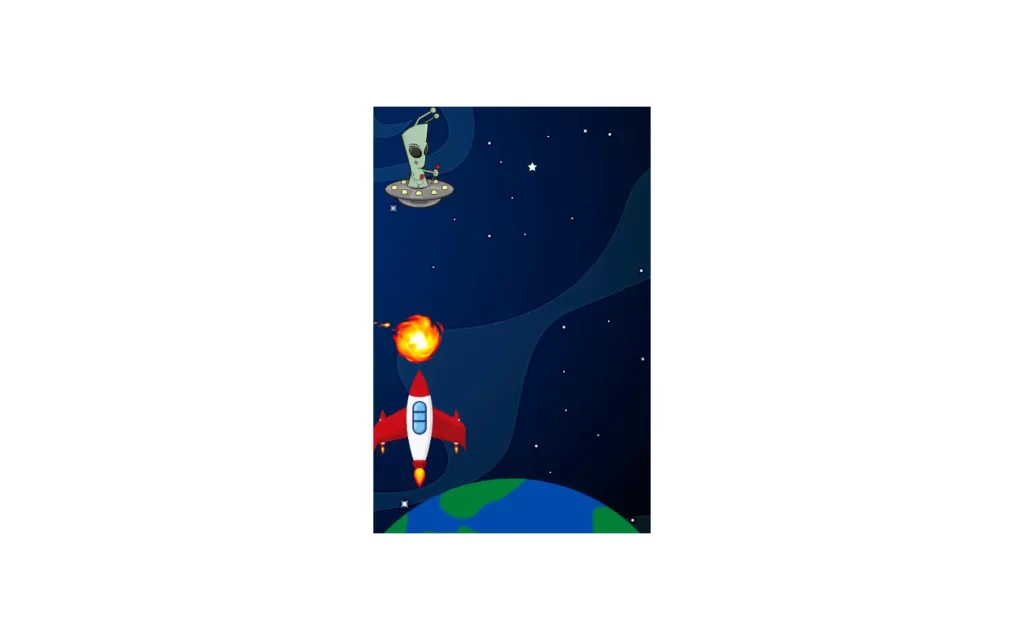
Firing Bullets
.bullet{
    width: 100px;
    height: auto;
    position: absolute;
    top: 370px;
    left: 0;
    text-align: center;
    animation: fire 1s linear 1 forwards;
}

.bulletImg{
    width: 100px;
    height: auto;
}

@keyframes fire {
    0%{
        top: 370px;
    }
    100%{
        top: -10px;
    }
}
const game = document.getElementById("game");
// fire bullet
window.addEventListener("keydown", function (e) {
    if (e.keyCode == "32") {
        var canon = document.createElement("div");
        var img = document.createElement("img");
        img.src = "fire.png";
        img.classList.add("bulletImg");
        canon.classList.add("bullet");
        canon.style.left = player.style.left;
        canon.appendChild(img);
        game.appendChild(canon);


        //When bullet hit alien
        setInterval(function collision() {
            var canonLeft = parseInt(window.getComputedStyle(canon).getPropertyValue("left"));
            var canonTop = parseInt(window.getComputedStyle(canon).getPropertyValue("top"));
            var alienLeft = parseInt(window.getComputedStyle(alien).getPropertyValue("left"));
            var alienTop = parseInt(window.getComputedStyle(alien).getPropertyValue("top"));

            if (((canonTop - alienTop) < 100) && (alienTop < canonTop)
                && (alienLeft === canonLeft)) {
                canon.style.display = 'none';
                alien.style.display = 'none';
            }
        }, 10);

        setTimeout(function () { canon.remove() }, 1000)

    }

})
Now, we will customize our bullet, so for that we will add an event listener on key down, In this we will need to shoot the bullet using space bar button, and it’s keycode is 32. In this, we have created var canon = document.createElement("div"); var img = document.createElement("img"); with these, we can create element using JavaScript. Also, we have added fire image, and we have appended it in the game div.
Now our bullet is ready to fire, but we need to add some timeout to remove the bullet after certain time, let’s take 100 which equals to 1 second. Then after we will remove the alien and bullet when distance between these two less than 100px, and alien and bullet is in same lane.
Moving Alien
.alienMove{
    animation: alienMove 1s linear  infinite  forwards;
}
@keyframes alienMove {
    0%{
        top: -10px;
    }
    100%{
        top: 470px;
    }

}
function alienMove() {
alien.style.display = 'block';
var random = ((Math.floor(Math.random() * 3)) * 130);
alien.style.left = random + "px";
alien.classList.add("alienMove");
counter++;
if (counter > 20) {
alien.style.animationDuration = '1.5s';
}
if(counter>30){
alien.style.animationDuration = '0.8';
}
}
setInterval(alienMove, 1000);Now we will add movement to alien, first in CSS we just need to add linear animation for infinite times. Then after, in JavaScript part, we added in alien in block, and also we here random variable which consist position of alien to appear random lane. With the help of Math.random() returns random values between 0 and 1, and we are multiplying with 3 to get multiple of 3s, with the help of Math.floor we will get integer like if we have 0.9 we will get 0, 1.3 we will get 1 etc.
Now we have to increase speed if 20 aliens are finished, and again we will speed up after alien will be 30.

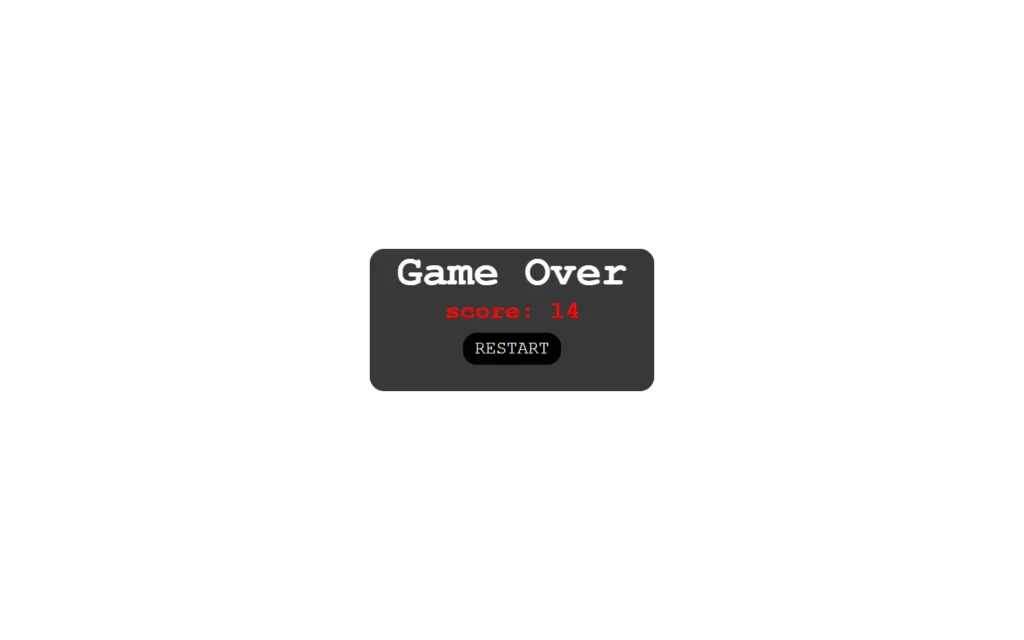
Creating Game Over Screen
<div id="result">
<h1>Game Over</h1>
<p id="score"></p>
<button id="btn" onclick="location.reload()">Restart</button>
</div>#result{
height: 200px;
width: 400px;
background-color: rgb(56, 56, 56);;
margin: 1rem auto;
border-radius: 20px;
font-size: 30px;
text-align: center;
color: white;
display:none ;
font-family: 'Courier New', Courier, monospace;
}
#score{
font-size: 2.2rem;
font-weight: bold;
color: red;
}
#btn{
padding: 0.5rem 1rem;
border-radius: 20px;
border: none;
background-color: black;
color: white;
font-size: 25px;
margin-top: 10px;
cursor: pointer;
text-transform: uppercase;
font-family: 'Courier New', Courier, monospace;
}*// Game over
function gameOver() {
var alienTop = parseInt(window.getComputedStyle(alien).getPropertyValue("top"));
if (alienTop > 400) {
result.style.display = 'block';
game.style.display = 'none';
score.innerHTML = `score: ${counter}`;
counter = 0;
gameOverSound.play();
}
}
setInterval(gameOver, 10);Now, we are in our final stage where we add game over screen, for that we have to add another div in HTML, and we just need here to add game over heading and score along with a button which reloads our game.
After that, we have to add some changes in CSS, we have here done so basic CSS styling but here only important part is display to none in the result part, again you can add any type of color or other CSS styling.
Now for JS part, we are comparing current location of alien with the location which is slightly higher than actual game container. Here we have compared with 400, if you remember game container was 390px. If the condition becomes true, then display will be none, and we display current score.

Full Source Code Of Space War Game Using HTML, CSS & JavaScript
index.html
<!DOCTYPE html>
<html lang="en">
<head>
<meta charset="UTF-8">
<meta http-equiv="X-UA-Compatible" content="IE=edge">
<meta name="viewport" content="width=device-width, initial-scale=1.0">
<title>space war game</title>
<link rel="stylesheet" href="style.css">
</head>
<body>
<div class="game" id="game">
<div class="player" id="player"><img src="pngegg (2).png" alt=""></div>
<div class="alien" id="alien"><img src="alien.png" alt=""></div>
</div>
<div id="result">
<h1>Game Over</h1>
<p id="score"></p>
<button id="btn" onclick="location.reload()">Restart</button>
</div>
<audio id="shoot" src="fireex.wav"></audio>
<audio id="gameover" src="gameover.wav"></audio>
<script src="main.js"></script>
</body>
</html>style.css
*{
margin: 0;
padding: 0;
}
body{
display: flex;
justify-content: center;
align-items: center;
min-height: 100vh;
}
.game{
width: 390px;
height: 600px;
background-image: url('spacebg.png');
overflow: hidden;
position: absolute;
}
.player{
width: 130px;
height: auto;
position: absolute;
top: 370px;
left: 0px;
text-align: center;
z-index: 1;
}
.player img{
width: 130px;
height: auto;
}
.alien{
width: 130px;
height: auto;
position: absolute;
top: 0px;
left: 0px;
text-align: center;
}
.alien img{
width: 100px;
height: auto;
}
.alienMove{
animation: alienMove 3s linear infinite forwards;
}
.bullet{
width: 100px;
height: auto;
position: absolute;
top: 370px;
left: 0;
text-align: center;
animation: fire 1s linear 1 forwards;
}
.bulletImg{
width: 100px;
height: auto;
}
@keyframes fire {
0%{
top: 370px;
}
100%{
top: -10px;
}
}
@keyframes alienMove {
0%{
top: -10px;
}
100%{
top: 470px;
}
}
#result{
height: 200px;
width: 400px;
background-color: rgb(56, 56, 56);;
margin: 1rem auto;
border-radius: 20px;
font-size: 30px;
text-align: center;
color: white;
display:none ;
font-family: 'Courier New', Courier, monospace;
}
#score{
font-size: 2.2rem;
font-weight: bold;
color: red;
}
#btn{
padding: 0.5rem 1rem;
border-radius: 20px;
border: none;
background-color: black;
color: white;
font-size: 25px;
margin-top: 10px;
cursor: pointer;
text-transform: uppercase;
font-family: 'Courier New', Courier, monospace;
}main.js
const player = document.getElementById("player");
const game = document.getElementById("game");
const alien = document.getElementById("alien");
// result section
var result = document.getElementById("result");
const score = document.getElementById("score");
var counter = 0;
// sounds
const shoot = document.getElementById("shoot");
const gameOverSound = document.getElementById('gameover');
// fighter jet movement
window.addEventListener("keydown", function (e) {
if (e.keyCode == "39") {
var playerLeft = parseInt(window.getComputedStyle(player).getPropertyValue("left"));
if (playerLeft < 260) {
player.style.left = (playerLeft + 130) + "px"
}
}
if (e.keyCode == "37") {
var playerLeft = parseInt(window.getComputedStyle(player).getPropertyValue("left"));
if (playerLeft > 0) {
player.style.left = (playerLeft - 130) + "px"
}
}
})
// fire bullet
window.addEventListener("keydown", function (e) {
if (e.keyCode == "32") {
var canon = document.createElement("div");
var img = document.createElement("img");
img.src = "fire.png";
img.classList.add("bulletImg");
canon.classList.add("bullet");
canon.style.left = player.style.left;
canon.appendChild(img);
game.appendChild(canon);
shoot.play();
//When bullet hit alien
setInterval(function collision() {
var canonLeft = parseInt(window.getComputedStyle(canon).getPropertyValue("left"));
var canonTop = parseInt(window.getComputedStyle(canon).getPropertyValue("top"));
var alienLeft = parseInt(window.getComputedStyle(alien).getPropertyValue("left"));
var alienTop = parseInt(window.getComputedStyle(alien).getPropertyValue("top"));
if (((canonTop - alienTop) < 100) && (alienTop < canonTop)
&& (alienLeft === canonLeft)) {
canon.style.display = 'none';
alien.style.display = 'none';
}
}, 10);
setTimeout(function () { canon.remove() }, 1000)
}
})
// Alien move
function alienMove() {
    alien.style.display = 'block';
    var random = ((Math.floor(Math.random() * 3)) * 130);
    alien.style.left = random + "px";
    alien.classList.add("alienMove");
    counter++;
    if (counter > 20) {
        alien.style.animationDuration = '1.5s';
    }
    if(counter>30){
        alien.style.animationDuration = '0.8';
    }

}

setInterval(alienMove, 1000);
// Game over
function gameOver() {
    var alienTop = parseInt(window.getComputedStyle(alien).getPropertyValue("top"));
    if (alienTop > 400) {
        result.style.display = 'block';
        game.style.display = 'none';
        score.innerHTML = `score: ${counter}`;
        counter = 0;
        gameOverSound.play();

    }
}

setInterval(gameOver, 10);Output


