


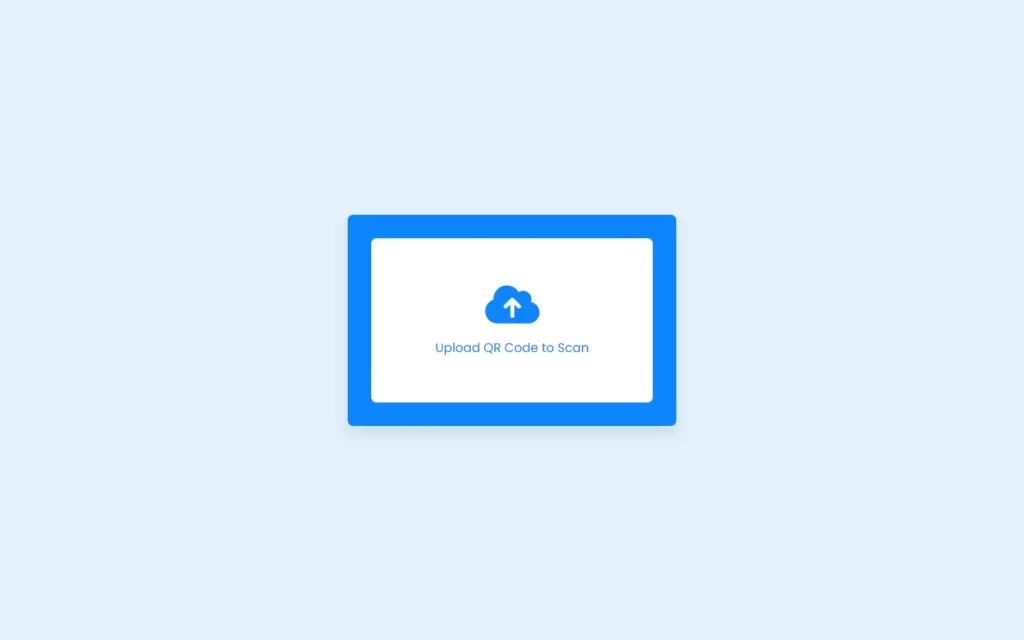
In this article, we will make a QR code reader in HTML, CSS & JavaScript. We will make the QR code using QR API which we will use in JavaScript. In this, we will provide an area to add an image of Qr code, and as soon we upload image then it automatically tries to read the Qr code. And also, If we try to upload anything except Qr code, then it won’t read it.
This is going to be a beginner-friendly project and basic project. So let’s make it step-by-step.
Pre-requisite to Make Qr Code Generator in HTML, CSS & JavaScript
- Basic Knowledge of HTML.
- Basic Knowledge of CSS.
- Basic Knowledge of JavaScript.
Creating HTML Skeleton
For this project, we need to basically three files. First will be our index.html, in this we will add our elements, and you can simply say we will create the skeleton of the project using HTML file. Then for designing purpose we will be adding our style.css file, with this we will add some styles to our HTML, this is going to be purely based on you, like you can customize it any way. And lastly, our script.js file, this will be our main file because we will add functionality so that we can generate our qr code using the JavaScript file.
Now in HTML, We have used font awesome to get the icon of upload file. Then in the body, we have added a wrapper <div>, in which we have added an input field with file type. Also, we have added a <div> to add some details, Then we have added a textarea in which we will print the information of the QR code. Lastly we have to add two buttons, one for copy and other for close. So this is it for our HTML.
<!DOCTYPE html>

<html lang="en" dir="ltr">
  <head>
    <meta charset="utf-8">
    <title>QR Code Reader</title>
    <link rel="stylesheet" href="style.css">
    <meta name="viewport" content="width=device-width, initial-scale=1.0">
    <!-- Font Awesome CDN Link for Icons -->
    <link rel="stylesheet" href="https://cdnjs.cloudflare.com/ajax/libs/font-awesome/6.1.1/css/all.min.css">
  </head>
  <body>
    <div class="wrapper">
      <form action="#">
        <input type="file" hidden>
        <img src="#" alt="qr-code">
        <div class="content">
          <i class="fas fa-cloud-upload"></i>
          <p>Upload QR Code to Read</p>
        </div>
      </form>
      <div class="details">
        <textarea spellcheck="false" disabled></textarea>
        <div class="buttons">
          <button class="close">Close</button>
          <button class="copy">Copy Text</button>
        </div>
      </div>
    </div>

    <script src="script.js"></script>

  </body>
</html>
Customizing And Styling Our Project
So after adding the basic elements which is actually perfect, but we need to add some CSS styling so that our project looks a little bit good. For that we just added some background color, added a font family, and did some customizations to our elements as well as we centered our project, added some border, color, transitions etc. to make the project interactive. CSS styling is purely depending on the developer to give more interactive look, so we won’t discuss much about it.
All source code will be provided below, so you can simply copy and paste it.
In CSS, you might see some changes like buttons, image etc. gets hide, this is because we need to create our project little bit dynamic. So as we upload the image, then these missing elements will be shown up. This thing we will control in our JS part.
/* Import Google Font - Poppins */
@import url('https://fonts.googleapis.com/css2?family=Poppins:wght@400;500;600;700&display=swap');
*{
  margin: 0;
  padding: 0;
  box-sizing: border-box;
  font-family: 'Poppins', sans-serif;
}
body{
  display: flex;
  align-items: center;
  justify-content: center;
  min-height: 100vh;
  padding: 0 10px;
  background: #E3F2FD;
}
.wrapper{
  height: 270px;
  width: 420px;
  border-radius: 7px;
  background: #0B85FF;
  padding: 30px 30px 35px;
  transition: height 0.2s ease;
  box-shadow: 0 10px 20px rgba(0,0,0,0.1);
}
.wrapper.active{
  height: 525px;
}
.wrapper form{
  height: 210px;
  display: flex;
  cursor: pointer;
  user-select: none;
  text-align: center;
  border-radius: 7px;
  background: #fff;
  align-items: center;
  justify-content: center;
  transition: height 0.2s ease;
}
.wrapper.active form{
  height: 225px;
  pointer-events: none;
}
form img{
  display: none;
  max-width: 148px;
}
.wrapper.active form img{
  display: block;
}
.wrapper.active form .content{
  display: none;
}
form .content i{
  color: #0B85FF;
  font-size: 55px;
}
form .content p{
  color: #0B85FF;
  margin-top: 15px;
  font-size: 16px;
}
.wrapper .details{
  opacity: 0;
  margin-top: 25px;
  pointer-events: none;
}
.wrapper.active .details{
  opacity: 1;
  pointer-events: auto;
  transition: opacity 0.5s 0.05s ease;
}
.details textarea{
  width: 100%;
  height: 128px;
  outline: none;
  resize: none;
  color: #fff;
  font-size: 18px;
  background: none;
  border-radius: 5px;
  padding: 10px 15px;
  border: 1px solid #fff;
}
textarea::-webkit-scrollbar{
  width: 0px;
}
textarea:hover::-webkit-scrollbar{
  width: 5px;
}
textarea:hover::-webkit-scrollbar-track{
  background: none;
}
textarea:hover::-webkit-scrollbar-thumb{
  background: #fff;
  border-radius: 8px;
}
.details .buttons{
  display: flex;
  margin-top: 20px;
  align-items: center;
  justify-content: space-between;
}
.buttons button{
  height: 55px;
  outline: none;
  border: none;
  font-weight: 500;
  font-size: 16px;
  cursor: pointer;
  color: #0B85FF;
  border-radius: 5px;
  background: #fff;
  transition: transform 0.3s ease;
  width: calc(100% / 2 - 10px);
}
.buttons button:active{
  transform: scale(0.95);
}

@media (max-width: 450px) {
  .wrapper{
    padding: 25px;
    height: 260px;
  }
  .wrapper.active{
    height: 520px;
  }
}
Adding JS Constant
const wrapper = document.querySelector(".wrapper"),
form = document.querySelector("form"),
fileInp = form.querySelector("input"),
infoText = form.querySelector("p"),
closeBtn = document.querySelector(".close"),
copyBtn = document.querySelector(".copy");
Fetching The File From System
Now we need to fetch our file from system like QR code image for that we have added an event listener on form to listen click event, in this we just call click() method so that we can access our system’s files.
Now we will add another event listener on input field, in which we have a variable which have our file or image. Then we have created an object of FormData(), which allows us to access the methods of FormData(). Here we have added our file to formData. Then we have called a function named fetchRequest() in which we will add logic to identify and fetch the data from qr code.
fileInp.addEventListener("change", async e => {
    let file = e.target.files[0];
    if(!file) return;
    let formData = new FormData();
    formData.append('file', file);
    fetchRequest(file, formData);
});
form.addEventListener("click", () => fileInp.click());
QR Code Reading Function
In this fetchRequest() function, we will add main logic to scan qr code. For that we have fetched our qrserver API, we have used post method to send formData as body. By this we want a response in JSON form using this line of code then(res => res.json()).then(result => { result = result[0].symbol[0].data;, this we will return data about the file. The result will be empty if we don’t add qr code, then we will replace the inner text with couldn’t scan qr code.
Then after we will target our textarea in which we will write our result value, and we will put image of QR code using this line of code form.querySelector("img").src = URL.createObjectURL(file);. Lastly we just added our active class in which have to show our buttons, images etc.
Now for copy button, we have added an event listener to listen click, in this we have assigned a variable to store text from textarea using document.querySelector("textarea").textContent. Then we need to copy the text as we click the button and this can be performed using the following line of code: document.querySelector("textarea").textContent
function fetchRequest(file, formData) {
    infoText.innerText = "Scanning QR Code...";
    fetch("http://api.qrserver.com/v1/read-qr-code/", {
        method: 'POST', body: formData
    }).then(res => res.json()).then(result => {
        result = result[0].symbol[0].data;
        infoText.innerText = result ? "Upload QR Code to Scan" : "Couldn't scan QR Code";
        if(!result) return;
        document.querySelector("textarea").innerText = result;
        form.querySelector("img").src = URL.createObjectURL(file);
        wrapper.classList.add("active");
    }).catch(() => {
        infoText.innerText = "Couldn't scan QR Code";
    });
}
copyBtn.addEventListener("click", () => {
    let text = document.querySelector("textarea").textContent;
    document.querySelector("textarea").textContent
});


closeBtn.addEventListener("click", () => wrapper.classList.remove("active"));
Full Source Code to Make QR Code Scanner & Reader in HTML, CSS & JavaScript
index.html
<!DOCTYPE html>

<html lang="en" dir="ltr">
  <head>
    <meta charset="utf-8">
    <title>QR Code Reader</title>
    <link rel="stylesheet" href="style.css">
    <meta name="viewport" content="width=device-width, initial-scale=1.0">
    <!-- Font Awesome CDN Link for Icons -->
    <link rel="stylesheet" href="https://cdnjs.cloudflare.com/ajax/libs/font-awesome/6.1.1/css/all.min.css">
  </head>
  <body>
    <div class="wrapper">
      <form action="#">
        <input type="file" hidden>
        <img src="#" alt="qr-code">
        <div class="content">
          <i class="fas fa-cloud-upload"></i>
          <p>Upload QR Code to Read</p>
        </div>
      </form>
      <div class="details">
        <textarea spellcheck="false" disabled></textarea>
        <div class="buttons">
          <button class="close">Close</button>
          <button class="copy">Copy Text</button>
        </div>
      </div>
    </div>

    <script src="script.js"></script>

  </body>
</html>
style.css
/* Import Google Font - Poppins */
@import url('https://fonts.googleapis.com/css2?family=Poppins:wght@400;500;600;700&display=swap');
*{
  margin: 0;
  padding: 0;
  box-sizing: border-box;
  font-family: 'Poppins', sans-serif;
}
body{
  display: flex;
  align-items: center;
  justify-content: center;
  min-height: 100vh;
  padding: 0 10px;
  background: #E3F2FD;
}
.wrapper{
  height: 270px;
  width: 420px;
  border-radius: 7px;
  background: #0B85FF;
  padding: 30px 30px 35px;
  transition: height 0.2s ease;
  box-shadow: 0 10px 20px rgba(0,0,0,0.1);
}
.wrapper.active{
  height: 525px;
}
.wrapper form{
  height: 210px;
  display: flex;
  cursor: pointer;
  user-select: none;
  text-align: center;
  border-radius: 7px;
  background: #fff;
  align-items: center;
  justify-content: center;
  transition: height 0.2s ease;
}
.wrapper.active form{
  height: 225px;
  pointer-events: none;
}
form img{
  display: none;
  max-width: 148px;
}
.wrapper.active form img{
  display: block;
}
.wrapper.active form .content{
  display: none;
}
form .content i{
  color: #0B85FF;
  font-size: 55px;
}
form .content p{
  color: #0B85FF;
  margin-top: 15px;
  font-size: 16px;
}
.wrapper .details{
  opacity: 0;
  margin-top: 25px;
  pointer-events: none;
}
.wrapper.active .details{
  opacity: 1;
  pointer-events: auto;
  transition: opacity 0.5s 0.05s ease;
}
.details textarea{
  width: 100%;
  height: 128px;
  outline: none;
  resize: none;
  color: #fff;
  font-size: 18px;
  background: none;
  border-radius: 5px;
  padding: 10px 15px;
  border: 1px solid #fff;
}
textarea::-webkit-scrollbar{
  width: 0px;
}
textarea:hover::-webkit-scrollbar{
  width: 5px;
}
textarea:hover::-webkit-scrollbar-track{
  background: none;
}
textarea:hover::-webkit-scrollbar-thumb{
  background: #fff;
  border-radius: 8px;
}
.details .buttons{
  display: flex;
  margin-top: 20px;
  align-items: center;
  justify-content: space-between;
}
.buttons button{
  height: 55px;
  outline: none;
  border: none;
  font-weight: 500;
  font-size: 16px;
  cursor: pointer;
  color: #0B85FF;
  border-radius: 5px;
  background: #fff;
  transition: transform 0.3s ease;
  width: calc(100% / 2 - 10px);
}
.buttons button:active{
  transform: scale(0.95);
}

@media (max-width: 450px) {
  .wrapper{
    padding: 25px;
    height: 260px;
  }
  .wrapper.active{
    height: 520px;
  }
}
script.js
const wrapper = document.querySelector(".wrapper"),
form = document.querySelector("form"),
fileInp = form.querySelector("input"),
infoText = form.querySelector("p"),
closeBtn = document.querySelector(".close"),
copyBtn = document.querySelector(".copy");

function fetchRequest(file, formData) {
    infoText.innerText = "Scanning QR Code...";
    fetch("http://api.qrserver.com/v1/read-qr-code/", {
        method: 'POST', body: formData
    }).then(res => res.json()).then(result => {
        result = result[0].symbol[0].data;
        infoText.innerText = result ? "Upload QR Code to Scan" : "Couldn't scan QR Code";
        if(!result) return;
        document.querySelector("textarea").innerText = result;
        form.querySelector("img").src = URL.createObjectURL(file);
        wrapper.classList.add("active");
    }).catch(() => {
        infoText.innerText = "Couldn't scan QR Code";
    });
}

fileInp.addEventListener("change", async e => {
    let file = e.target.files[0];
    if(!file) return;
    let formData = new FormData();
    formData.append('file', file);
    fetchRequest(file, formData);
});

copyBtn.addEventListener("click", () => {
    let text = document.querySelector("textarea").textContent;
    navigator.clipboard.writeText(text);
});

form.addEventListener("click", () => fileInp.click());
closeBtn.addEventListener("click", () => wrapper.classList.remove("active"));
Output

Check out awesome video reference here:


