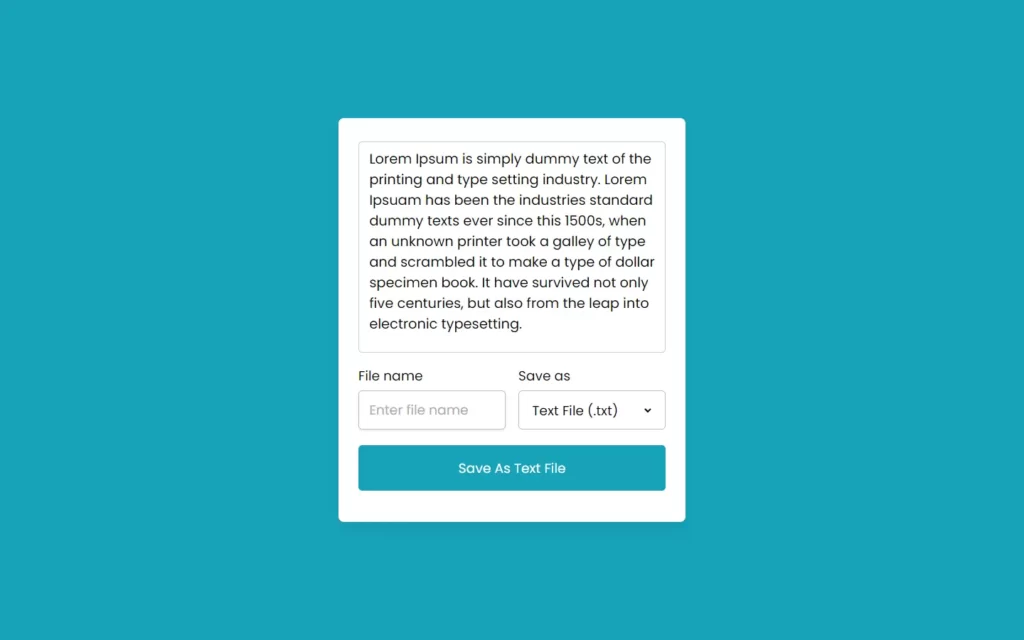
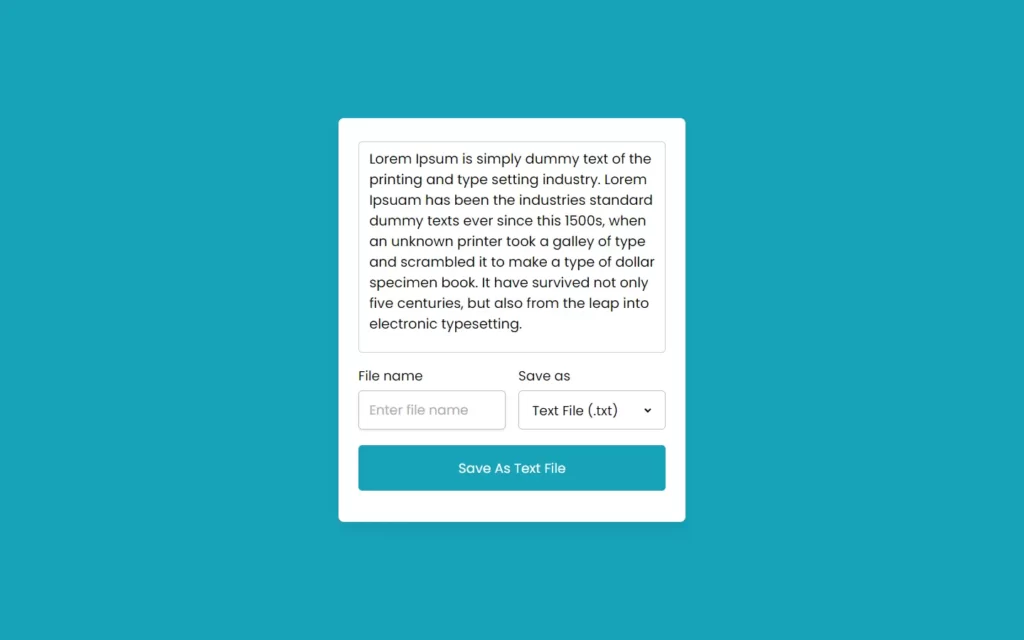
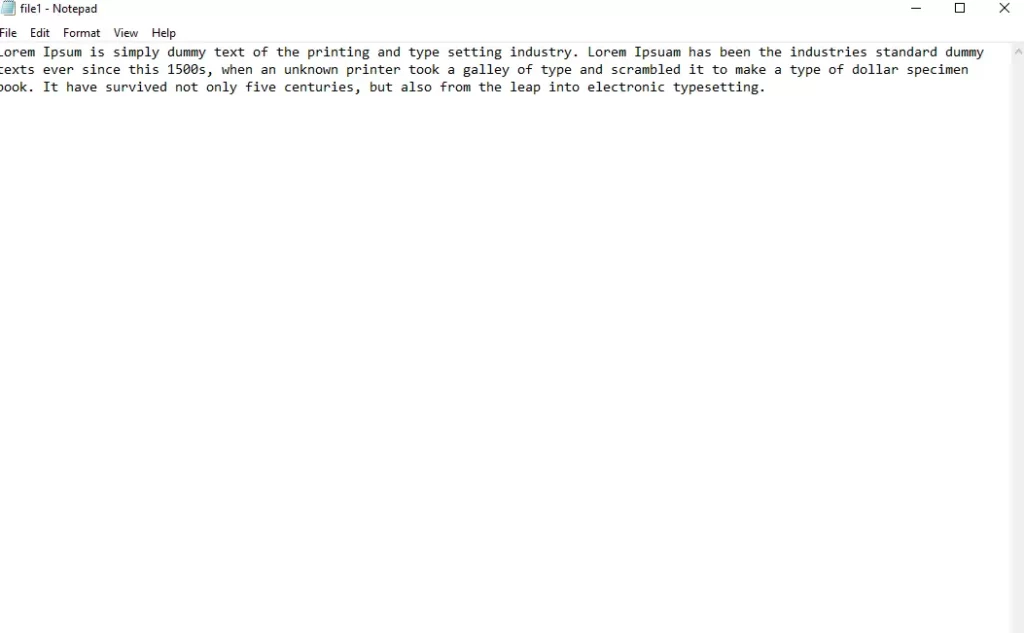
In today’s article, we will be making a project to save text as file in HTML, CSS & JavaScript. Simply we will give a field in which we will allow user to add some text, and also we will add a field to name the file and file type along with a button to download the file.
We will have some file types like text, SVG, HTML and many more. This will very cool project to do, and you will learn a lot from it, if you are learning JavaScript. So, without any further things, let’s make this project step-by-step.
Pre-requisites to Save Text as File in HTML, CSS & JavaScript
- Basic Knowledge of HTML.
- Basic Knowledge of CSS.
- Basic Knowledge of JavaScript.
Creating HTML Markup
For this project, we need to basically three files. First will be our index.html, in this we will add our elements, and you can simply say we will create the skeleton of the project using HTML file. Then for designing purpose we will be adding our style.css file, with this we will add some styles to our HTML, this is going to be purely based on you, like you can customize it any way. And lastly, our script.js file, this will be our main file because we will add functionality so that we can download the text as file using the JavaScript file.
Now in HTML, we have added a textarea so that we can write some text in it. Also, we added spellcheck to false so that spelling mistake can be avoided. Then we have added an input field in which we can write the name of the file. After that, we will add a select menu with some options like file types. Lastly, we need a button to download the file.
<!DOCTYPE html>
<html lang="en" dir="ltr">
  <head>
    <meta charset="utf-8">
    <title>Save Text As File</title>
    <link rel="stylesheet" href="style.css">
    <meta name="viewport" content="width=device-width, initial-scale=1.0">
    <script src="script.js" defer></script>
  </head>
  <body>
    <div class="wrapper">
      <textarea spellcheck="false" placeholder="Enter something to save" required>Lorem Ipsum is simply dummy text of the printing and type setting industry. Lorem Ipsuam has been the industries standard dummy texts ever since this 1500s, when an unknown printer took a galley of type and scrambled it to make a type of dollar specimen book. It have survived not only five centuries, but also from the leap into electronic typesetting.</textarea>
      <div class="file-options">
        <div class="option file-name">
          <label>File name</label>
          <input type="text" spellcheck="false" placeholder="Enter file name">
        </div>
        <div class="option save-as">
          <label>Save as</label>
          <div class="select-menu">
            <select>
              <option value="text/plain">Text File (.txt)</option>
              <option value="text/javascript">JS File (.js)</option>
              <option value="text/html">HTML File (.html)</option>
              <option value="image/svg+xml">SVG File (.svg)</option>
              <option value="application/msword">Doc File (.doc)</option>
              <option value="application/vnd.ms-powerpoint">PPT File (.ppt)</option>
            </select>
          </div>
        </div>
      </div>
      <button class="save-btn" type="button">Save As Text File</button>
    </div>

  </body>
</html>
Adding Customizations to The Project
So after adding the basic elements which is actually perfect, but we need to add some CSS styling so that our project looks a little bit good. For that we just added some background color, added a font family, and did some customizations to our elements as well as we centered our project, added some border, color, transitions etc. to make the project interactive. CSS styling is purely depending on the developer to give more interactive look, so we won’t discuss much about it.
All source code will be provided below, so you can simply copy and paste it.
/* Import Google font - Poppins */
@import url('https://fonts.googleapis.com/css2?family=Poppins:wght@400;500;600&display=swap');
*{
  margin: 0;
  padding: 0;
  box-sizing: border-box;
  font-family: 'Poppins', sans-serif;
}
body{
  display: flex;
  align-items: center;
  justify-content: center;
  min-height: 100vh;
  padding: 10px;
  background: #17A2B8;
}
.wrapper{
  width: 443px;
  border-radius: 7px;
  background: #fff;
  padding: 30px 25px 40px;
  box-shadow: 0 10px 15px rgba(0,0,0,0.05);
}
.wrapper :where(textarea, input, select, button){
  width: 100%;
  outline: none;
  border: none;
  font-size: 17px;
  border-radius: 5px;
}
.wrapper :where(textarea, input)::placeholder{
  color: #aaa;
}
.wrapper :where(textarea, input):focus{
  box-shadow: 0px 2px 4px rgba(0,0,0,0.08);
}
.wrapper textarea{
  height: 270px;
  resize: none;
  padding: 8px 13px;
  font-size: 17.6px;
  border: 1px solid #ccc;
}
.wrapper .file-options{
  display: flex;
  margin-top: 10px;
  align-items: center;
  justify-content: space-between;
}
.file-options .option{
  width: calc(100% / 2 - 8px);
}
.option label{
  font-size: 17px;
}
.option :where(input, .select-menu){
  height: 50px;
  padding: 0 13px;
  margin-top: 6px;
  border-radius: 5px;
  border: 1px solid #bfbfbf;
}
.option .select-menu select{
  height: 50px;
  background: none;
}
.wrapper .save-btn{
  color: #fff;
  cursor: pointer;
  opacity: 0.6;
  padding: 16px 0;
  margin-top: 20px;
  pointer-events: none;
  background: #17A2B8;
}
.save-btn:hover{
  background: #148c9f;
}
textarea:valid ~ .save-btn{
  opacity: 1;
  pointer-events: auto;
  transition: all 0.3s ease;
}

@media screen and (max-width: 475px) {
  .wrapper{
    padding: 25px 18px 30px;
  }
  .wrapper :where(textarea, input, select, button, label){
    font-size: 16px!important;
  }
  .file-options .option{
    width: calc(100% / 2 - 5px);
  }
  .option :where(input, .select-menu){
    padding: 0 10px;
  }
  .wrapper .save-btn{
    padding: 15px 0;
  }
}
Adding JS Constant
Now our project is looking beautiful, Now we need to add functionalities in this. So as we know JavaScript is powerful, so we will take help from JS. In JS file, we have added some constants in order to fetch required elements. We have used the document.querySelector() method to fetch the classes of elements to access those elements. We have fetched here textarea, input field, select menu and button.
const textarea = document.querySelector("textarea"),
fileNameInput = document.querySelector(".file-name input"),
selectMenu = document.querySelector(".save-as select"),
saveBtn = document.querySelector(".save-btn");
Adding Functionality to Button
Now we will first talk about save button functionality, here we have used Blob. Blob is simply used to fetch row data, and also we can convert the raw data to readable stream. Basically, we have here created an object of blob which contains the value of textarea which simply return a number, and we provided type of the content which selected in select menu. Then we have added a constant fileurl in which we have used the URL.createObjectURl() method which will creates a URL for the passed object.
After that, we have created an anchor tag element inside the button. Then we have added link.download = fileNameInput.value to pass file name as download value link. Then we have added file URL in the href value link, Lastly we added click() method so downloading will be performed.
selectMenu.addEventListener("change", () => {
    const selectedFormat = selectMenu.options[selectMenu.selectedIndex].text;
    saveBtn.innerText = `Save As ${selectedFormat.split(" ")[0]} File`;
});

saveBtn.addEventListener("click", () => {
    const blob = new Blob([textarea.value], {type: selectMenu.value});
    const fileUrl = URL.createObjectURL(blob);
    const link = document.createElement("a");
    link.download = fileNameInput.value;
    link.href = fileUrl;
    link.click();
});

Full Source Code to Save Text as File in HTML, CSS & JavaScript
index.html
<!DOCTYPE html>
<html lang="en" dir="ltr">
  <head>
    <meta charset="utf-8">
    <title>Save Text As File</title>
    <link rel="stylesheet" href="style.css">
    <meta name="viewport" content="width=device-width, initial-scale=1.0">
    <script src="script.js" defer></script>
  </head>
  <body>
    <div class="wrapper">
      <textarea spellcheck="false" placeholder="Enter something to save" required>Lorem Ipsum is simply dummy text of the printing and type setting industry. Lorem Ipsuam has been the industries standard dummy texts ever since this 1500s, when an unknown printer took a galley of type and scrambled it to make a type of dollar specimen book. It have survived not only five centuries, but also from the leap into electronic typesetting.</textarea>
      <div class="file-options">
        <div class="option file-name">
          <label>File name</label>
          <input type="text" spellcheck="false" placeholder="Enter file name">
        </div>
        <div class="option save-as">
          <label>Save as</label>
          <div class="select-menu">
            <select>
              <option value="text/plain">Text File (.txt)</option>
              <option value="text/javascript">JS File (.js)</option>
              <option value="text/html">HTML File (.html)</option>
              <option value="image/svg+xml">SVG File (.svg)</option>
              <option value="application/msword">Doc File (.doc)</option>
              <option value="application/vnd.ms-powerpoint">PPT File (.ppt)</option>
            </select>
          </div>
        </div>
      </div>
      <button class="save-btn" type="button">Save As Text File</button>
    </div>

  </body>
</html>
style.css
/* Import Google font - Poppins */
@import url('https://fonts.googleapis.com/css2?family=Poppins:wght@400;500;600&display=swap');
*{
  margin: 0;
  padding: 0;
  box-sizing: border-box;
  font-family: 'Poppins', sans-serif;
}
body{
  display: flex;
  align-items: center;
  justify-content: center;
  min-height: 100vh;
  padding: 10px;
  background: #17A2B8;
}
.wrapper{
  width: 443px;
  border-radius: 7px;
  background: #fff;
  padding: 30px 25px 40px;
  box-shadow: 0 10px 15px rgba(0,0,0,0.05);
}
.wrapper :where(textarea, input, select, button){
  width: 100%;
  outline: none;
  border: none;
  font-size: 17px;
  border-radius: 5px;
}
.wrapper :where(textarea, input)::placeholder{
  color: #aaa;
}
.wrapper :where(textarea, input):focus{
  box-shadow: 0px 2px 4px rgba(0,0,0,0.08);
}
.wrapper textarea{
  height: 270px;
  resize: none;
  padding: 8px 13px;
  font-size: 17.6px;
  border: 1px solid #ccc;
}
.wrapper .file-options{
  display: flex;
  margin-top: 10px;
  align-items: center;
  justify-content: space-between;
}
.file-options .option{
  width: calc(100% / 2 - 8px);
}
.option label{
  font-size: 17px;
}
.option :where(input, .select-menu){
  height: 50px;
  padding: 0 13px;
  margin-top: 6px;
  border-radius: 5px;
  border: 1px solid #bfbfbf;
}
.option .select-menu select{
  height: 50px;
  background: none;
}
.wrapper .save-btn{
  color: #fff;
  cursor: pointer;
  opacity: 0.6;
  padding: 16px 0;
  margin-top: 20px;
  pointer-events: none;
  background: #17A2B8;
}
.save-btn:hover{
  background: #148c9f;
}
textarea:valid ~ .save-btn{
  opacity: 1;
  pointer-events: auto;
  transition: all 0.3s ease;
}

@media screen and (max-width: 475px) {
  .wrapper{
    padding: 25px 18px 30px;
  }
  .wrapper :where(textarea, input, select, button, label){
    font-size: 16px!important;
  }
  .file-options .option{
    width: calc(100% / 2 - 5px);
  }
  .option :where(input, .select-menu){
    padding: 0 10px;
  }
  .wrapper .save-btn{
    padding: 15px 0;
  }
}
script.js
const textarea = document.querySelector("textarea"),
fileNameInput = document.querySelector(".file-name input"),
selectMenu = document.querySelector(".save-as select"),
saveBtn = document.querySelector(".save-btn");

selectMenu.addEventListener("change", () => {
    const selectedFormat = selectMenu.options[selectMenu.selectedIndex].text;
    saveBtn.innerText = `Save As ${selectedFormat.split(" ")[0]} File`;
});

saveBtn.addEventListener("click", () => {
    const blob = new Blob([textarea.value], {type: selectMenu.value});
    const fileUrl = URL.createObjectURL(blob);
    const link = document.createElement("a");
    link.download = fileNameInput.value;
    link.href = fileUrl;
    link.click();
});Check out awesome video reference here:


