Pre-requisites to Make Show and Hide Password In HTML, CSS, and JavaScript
Setting up The Project
<!DOCTYPE html>
    <html lang="en">
    <head>
        <meta charset="UTF-8">
        <meta name="viewport" content="width=device-width, initial-scale=1.0">

        <!--=============== BOXICONS ===============-->
        <link rel="stylesheet" href="https://cdn.jsdelivr.net/npm/boxicons@latest/css/boxicons.min.css">

        <!--=============== CSS ===============-->
        <link rel="stylesheet" href="assets/css/styles.css">

        <title>Input password show hidden</title>
    </head>
    <body>
        <div class="input">
            <div class="input__overlay" id="input-overlay"></div>

            <i class='bx bx-lock-alt input__lock'></i>
            <input type="password" placeholder="Password..." class="input__password" id="input-pass">
            <i class='bx bx-hide input__icon' id="input-icon"></i>
        </div>

        <!--=============== MAIN JS ===============-->
        <script src="assets/js/script.js"></script>
    </body>
</html>
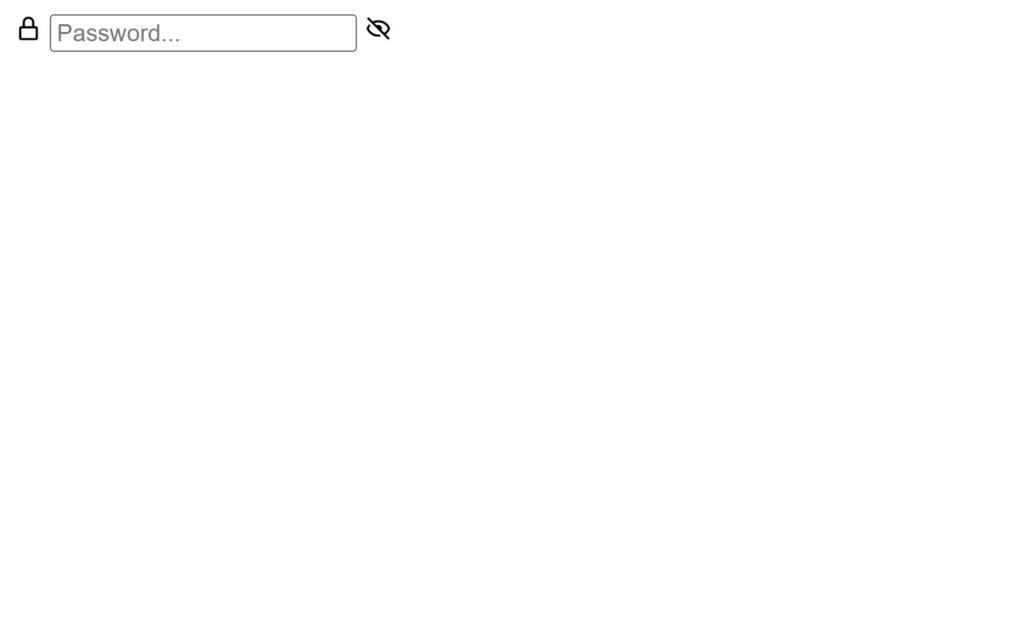
We have added our code as above, in this we can see we have added a div, in which we have added an icon for lock. We have here added an input field for password, and we have gave its type of password as well. Then we also added eye icon in this field. As we can see, we have added classes to all the elements, so we can add style to them and add JS functionality using them.

Designing These Elements
As we can see here, the output of our HTML is straight-forward, but it doesn’t look so good. So we will add our custom designs to these elements to make the output very attractive and good. Since this project mainly depends on JavaScript, and designing is purely depending on the user that how does user need this form to look a like, so we don’t get so much in the deep in CSS. You can also apply this below code to make this project similar. Also, we will provide the full source code for this, so you can easily download and use it.
But here only one thing I want to point out is we will add some animation like if we click the icon then whole input color will change. We will add customizations for that as well. We will add that customization when icon get click and this thing we will control using JavaScript.
/*=============== GOOGLE FONTS ===============*/
@import url("https://fonts.googleapis.com/css2?family=Poppins&display=swap");
/*=============== VARIABLES CSS ===============*/
:root {
  /*========== Colors ==========*/
  --first-color: hsl(232, 54%, 43%);
  --text-color: hsl(232, 8%, 35%);
  --white-color: hsl(232, 100%, 99%);
  --body-color: hsl(232, 45%, 90%);
  --container-color: hsl(232, 54%, 11%);
}

/*=============== INPUT PASSWORD ===============*/
* {
  box-sizing: border-box;
  font-family: 'Poppins', sans-serif;
}

body {
  margin: 0;
  height: 100vh;
  display: grid;
  place-items: center;
  background-color: var(--body-color);
}

.input {
  position: relative;
  background-color: var(--container-color);
  padding: 1.35rem 1.25rem;
  border-radius: .5rem;
  display: flex;
  align-items: center;
  column-gap: .75rem;
}

.input__lock, .input__icon {
  font-size: 1.25rem;
  z-index: 1;
}

.input__lock, .input__password {
  color: var(--white-color);
}

.input__icon {
  color: var(--first-color);
  cursor: pointer;
}

.input__password {
  background: transparent;
  border: none;
  outline: none;
  font-size: 14px;
  z-index: 1;
}

.input__password::placeholder {
  color: var(--white-color);
}

.input__overlay {
  width: 32px;
  height: 32px;
  background-color: var(--white-color);
  position: absolute;
  right: .9rem;
  border-radius: 50%;
  z-index: 0;
  transition: .4s ease-in-out;
}

/* Transition effect */
.overlay-content {
  width: 100%;
  height: 100%;
  border-radius: .5rem;
  right: 0;
}

.overlay-content ~ .input__lock {
  color: var(--container-color);
}

.overlay-content ~ .input__password,
.overlay-content ~ .input__password::placeholder {
  color: var(--text-color);
}

Setting up Show and Hide in JavaScript
Since our project looks cool and attractive, let’s add our functionalities using JavaScript. In JavaScript, we have added a function. Here we used arrow function, so don’t get confuse with this. Then we have added some constants, for these we have fetched the inputOverlay, inputPass, and inputIcon IDs using document.getElementById method.
Now we will add click event on the iconEye constant, in which we have fetched our icon using inputIcon ID. In this event listener, we have added a condition to check where the given input’s type is password or not. If the condition becomes true, then we change this password type to text type, so the password will be visible as text. And also we will add our bx-show class, which actually a box-icon class for eye icon. This will override our hide icon.
If the condition becomes false, then we will change this text type to password type. And also, we will remove our bx-show class, so that hide icon will come over. Lastly, we will add our overlay-content class as toggle, so that if the icon get hits then some effect added in overlay-content will show up. Finally, to add these functionalities, we have called function to get the effect of these things.
/*=============== SHOW / HIDDEN INPUT ===============*/
const showHiddenInput = (inputOverlay, inputPass, inputIcon) =>{
    const overlay = document.getElementById(inputOverlay),
          input = document.getElementById(inputPass),
          iconEye = document.getElementById(inputIcon)

    iconEye.addEventListener('click', () =>{
        // Change password to text
        if(input.type === 'password'){
            // Switch to text
            input.type = 'text'

            // Change icon
            iconEye.classList.add('bx-show')
        }else{
            // Change to password
            input.type = 'password'

            // Remove icon
            iconEye.classList.remove('bx-show')
        }

        // Toggle the overlay
        overlay.classList.toggle('overlay-content')
    })
}

showHiddenInput('input-overlay','input-pass','input-icon')

Full Source Code to Make Show and Hide Password In HTML, CSS, and JavaScript
index.html
<!DOCTYPE html>
    <html lang="en">
    <head>
        <meta charset="UTF-8">
        <meta name="viewport" content="width=device-width, initial-scale=1.0">

        <!--=============== BOXICONS ===============-->
        <link rel="stylesheet" href="https://cdn.jsdelivr.net/npm/boxicons@latest/css/boxicons.min.css">

        <!--=============== CSS ===============-->
        <link rel="stylesheet" href="assets/css/styles.css">

        <title>Input password show hidden - Bedimcode</title>
    </head>
    <body>
        <div class="input">
            <div class="input__overlay" id="input-overlay"></div>

            <i class='bx bx-lock-alt input__lock'></i>
            <input type="password" placeholder="Password..." class="input__password" id="input-pass">
            <i class='bx bx-hide input__icon' id="input-icon"></i>
        </div>

        <!--=============== MAIN JS ===============-->
        <script src="assets/js/main.js"></script>
    </body>
</html>
style.css
/*=============== GOOGLE FONTS ===============*/
@import url("https://fonts.googleapis.com/css2?family=Poppins&display=swap");
/*=============== VARIABLES CSS ===============*/
:root {
  /*========== Colors ==========*/
  --first-color: hsl(232, 54%, 43%);
  --text-color: hsl(232, 8%, 35%);
  --white-color: hsl(232, 100%, 99%);
  --body-color: hsl(232, 45%, 90%);
  --container-color: hsl(232, 54%, 11%);
}

/*=============== INPUT PASSWORD ===============*/
* {
  box-sizing: border-box;
  font-family: 'Poppins', sans-serif;
}

body {
  margin: 0;
  height: 100vh;
  display: grid;
  place-items: center;
  background-color: var(--body-color);
}

.input {
  position: relative;
  background-color: var(--container-color);
  padding: 1.35rem 1.25rem;
  border-radius: .5rem;
  display: flex;
  align-items: center;
  column-gap: .75rem;
}

.input__lock, .input__icon {
  font-size: 1.25rem;
  z-index: 1;
}

.input__lock, .input__password {
  color: var(--white-color);
}

.input__icon {
  color: var(--first-color);
  cursor: pointer;
}

.input__password {
  background: transparent;
  border: none;
  outline: none;
  font-size: 14px;
  z-index: 1;
}

.input__password::placeholder {
  color: var(--white-color);
}

.input__overlay {
  width: 32px;
  height: 32px;
  background-color: var(--white-color);
  position: absolute;
  right: .9rem;
  border-radius: 50%;
  z-index: 0;
  transition: .4s ease-in-out;
}

/* Transition effect */
.overlay-content {
  width: 100%;
  height: 100%;
  border-radius: .5rem;
  right: 0;
}

.overlay-content ~ .input__lock {
  color: var(--container-color);
}

.overlay-content ~ .input__password,
.overlay-content ~ .input__password::placeholder {
  color: var(--text-color);
}
script.js
/*=============== SHOW / HIDDEN INPUT ===============*/
const showHiddenInput = (inputOverlay, inputPass, inputIcon) =>{
    const overlay = document.getElementById(inputOverlay),
          input = document.getElementById(inputPass),
          iconEye = document.getElementById(inputIcon)

    iconEye.addEventListener('click', () =>{
        // Change password to text
        if(input.type === 'password'){
            // Switch to text
            input.type = 'text'

            // Change icon
            iconEye.classList.add('bx-show')
        }else{
            // Change to password
            input.type = 'password'

            // Remove icon
            iconEye.classList.remove('bx-show')
        }

        // Toggle the overlay
         overlay.classList.toggle('overlay-content')
    })
}

showHiddenInput('input-overlay','input-pass','input-icon')
Output

Check out video reference here:


