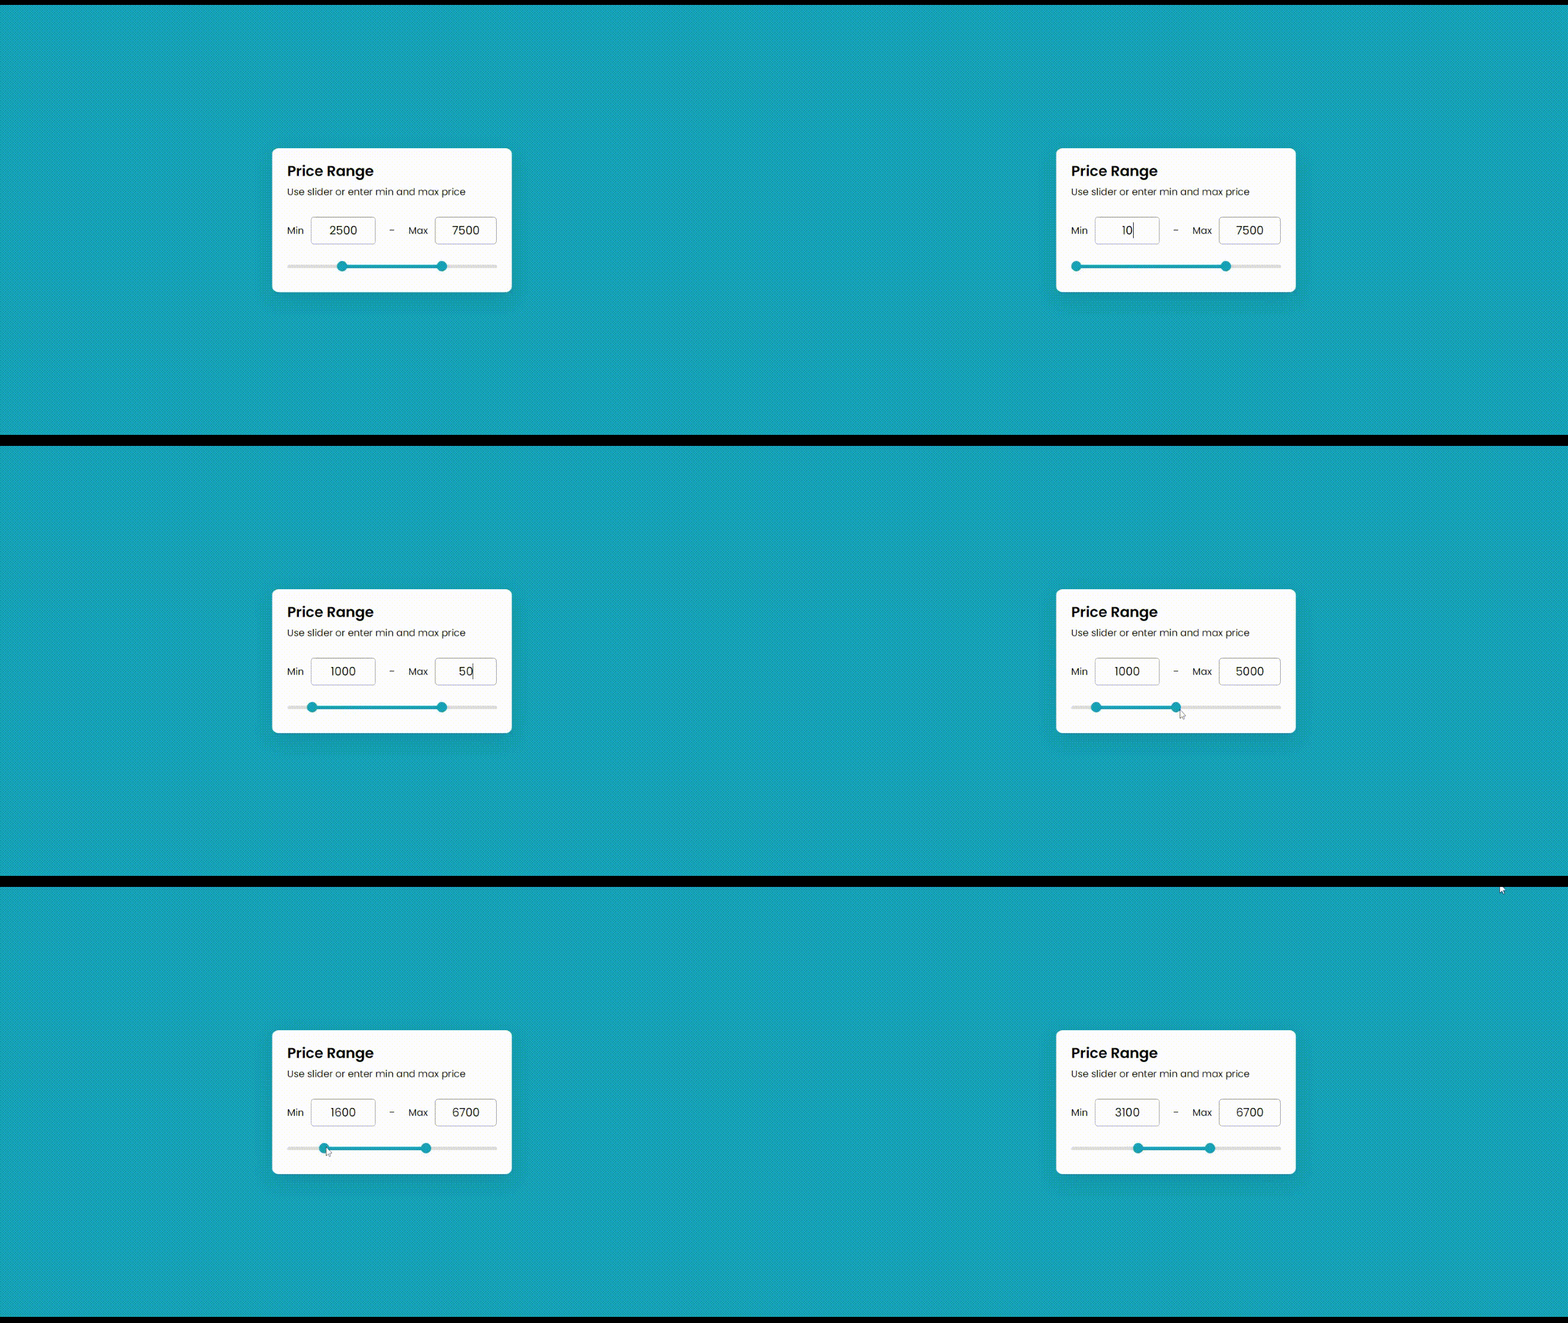
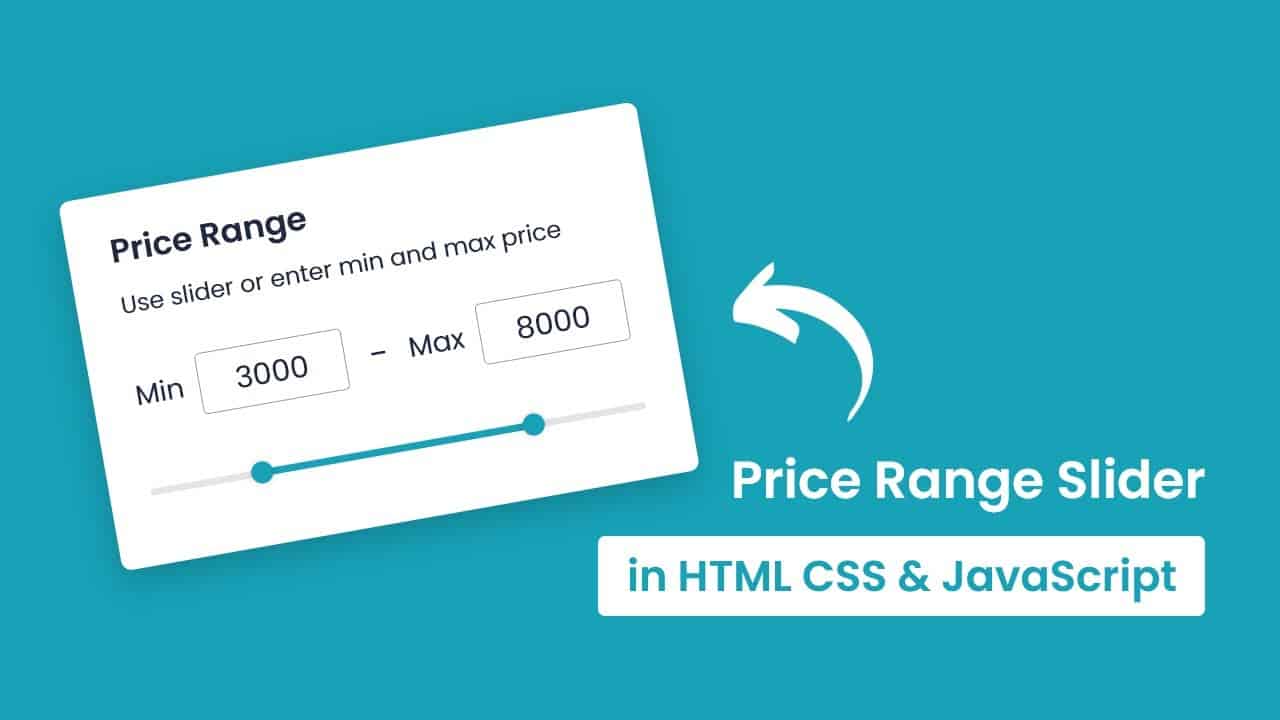
In this article, we will make a price range slider using JavaScript. Here we will also add min-max input, which will vary as slider move. As we know, some e-commerce websites like Amazon, Flipkart etc. have this kind of feature, so products can be sorted as price range. We create the same thing here. We will have two input fields, one for minimum price and another for maximum value, Also we will add two sliders associated to these input fields.
As we change the value of input fields, sliders will adjust and if we move a slider then input field’s value will get changed as per slider position. This is going to be a very easy and beginner-friendly project, so let’s make it step-by-step.
Pre-requisites to Make Price Range Slider Using JavaScript
- Basic knowledge of HTML.
- Basic knowledge of CSS.
- Basic knowledge of JavaScript.
Creating Basic Skeleton
For this project, we need to basically three files. First will be our index.html, in this we will add our elements, and you can simply say we will create the skeleton of the project using HTML file. Then for designing purpose we will be adding our style.css file, with this we will add some styles to our HTML, this is going to be purely based on you, like you can customize it any way. And lastly, our script.js file, this will be our main file because we will add functionality so that we can control sliders and values using the JavaScript file.
In HTML, we have added a parent <div> wrapper, in this we have added two input fields for value inputs with some default values. Now we have to add sliders, for that we have added another two input tags with the type range, and we have put same values as above input fields. Also, we added steps of 100, so slider movement will increase or decrease the value by 100.
<!DOCTYPE html>
<html lang="en" dir="ltr">
  <head>
    <meta charset="utf-8">
    <title>Price Range Slider</title>
    <link rel="stylesheet" href="style.css">
    <meta name="viewport" content="width=device-width, initial-scale=1.0">
  </head>
  <body>
    <div class="wrapper">
      <header>
        <h2>Price Range</h2>
        <p>Use slider or enter min and max price</p>
      </header>
      <div class="price-input">
        <div class="field">
          <span>Min</span>
          <input type="number" class="input-min" value="2500">
        </div>
        <div class="separator">-</div>
        <div class="field">
          <span>Max</span>
          <input type="number" class="input-max" value="7500">
        </div>
      </div>
      <div class="slider">
        <div class="progress"></div>
      </div>
      <div class="range-input">
        <input type="range" class="range-min" min="0" max="10000" value="2500" step="100">
        <input type="range" class="range-max" min="0" max="10000" value="7500" step="100">
      </div>
    </div>

    <script src="script.js"></script>

  </body>
</html>

Customizing And Adding CSS
So after adding the basic elements which is actually perfect, but we need to add some CSS styling so that our project looks a little bit good. For that we just added some background color, added a font family, and did some customizations to our elements as well as we centered our project, added some border, color, transitions etc. to make the project interactive. CSS styling is purely depending on the developer to give more interactive look, so we won’t discuss much about it.
All source code will be provided below, so you can simply copy and paste it.
/* Import Google Font - Poppins */
@import url('https://fonts.googleapis.com/css2?family=Poppins:wght@400;500;600;700&display=swap');
*{
  margin: 0;
  padding: 0;
  box-sizing: border-box;
  font-family: 'Poppins', sans-serif;
}
body{
  display: flex;
  align-items: center;
  justify-content: center;
  min-height: 100vh;
  background: #17A2B8;
}
::selection{
  color: #fff;
  background: #17A2B8;
}
.wrapper{
  width: 400px;
  background: #fff;
  border-radius: 10px;
  padding: 20px 25px 40px;
  box-shadow: 0 12px 35px rgba(0,0,0,0.1);
}
header h2{
  font-size: 24px;
  font-weight: 600;
}
header p{
  margin-top: 5px;
  font-size: 16px;
}
.price-input{
  width: 100%;
  display: flex;
  margin: 30px 0 35px;
}
.price-input .field{
  display: flex;
  width: 100%;
  height: 45px;
  align-items: center;
}
.field input{
  width: 100%;
  height: 100%;
  outline: none;
  font-size: 19px;
  margin-left: 12px;
  border-radius: 5px;
  text-align: center;
  border: 1px solid #999;
  -moz-appearance: textfield;
}
input[type="number"]::-webkit-outer-spin-button,
input[type="number"]::-webkit-inner-spin-button {
  -webkit-appearance: none;
}
.price-input .separator{
  width: 130px;
  display: flex;
  font-size: 19px;
  align-items: center;
  justify-content: center;
}
.slider{
  height: 5px;
  position: relative;
  background: #ddd;
  border-radius: 5px;
}
.slider .progress{
  height: 100%;
  left: 25%;
  right: 25%;
  position: absolute;
  border-radius: 5px;
  background: #17A2B8;
}
.range-input{
  position: relative;
}
.range-input input{
  position: absolute;
  width: 100%;
  height: 5px;
  top: -5px;
  background: none;
  pointer-events: none;
  -webkit-appearance: none;
  -moz-appearance: none;
}
input[type="range"]::-webkit-slider-thumb{
  height: 17px;
  width: 17px;
  border-radius: 50%;
  background: #17A2B8;
  pointer-events: auto;
  -webkit-appearance: none;
  box-shadow: 0 0 6px rgba(0,0,0,0.05);
}
input[type="range"]::-moz-range-thumb{
  height: 17px;
  width: 17px;
  border: none;
  border-radius: 50%;
  background: #17A2B8;
  pointer-events: auto;
  -moz-appearance: none;
  box-shadow: 0 0 6px rgba(0,0,0,0.05);
}
Adding JS Constant
const rangeInput = document.querySelectorAll(".range-input input"),
priceInput = document.querySelectorAll(".price-input input"),
range = document.querySelector(".slider .progress");
let priceGap = 1000;
Customizing Input Values
Now we have to work on our input fields to control sliders. For that, we have added forEach to access both input fields, in this we have added an event listener to listen input event. As soon, we input something then we will fetch values to minPrice and maxPrice variables using let minPrice = parseInt(priceInput[0].value), maxPrice = parseInt(priceInput[1].value);, here 0 refers to first input associated to minimum value and 1 refers to maximum value.
After that, we have compared difference between maxPrice and minPrice with priceGap and maxPrice is less or equal to slider’s value. If this condition becomes true then again we check if classname is equals to input-min which is actually class of minimum input field. If this condition is true, then we will replace slider’s value with minPrice, and also we will modify little CSS using this line of code range.style.left = ((minPrice / rangeInput[0].max) * 100) + "%";. With this code, slider will move according to minPrice’s value.
If the above condition becomes false, then we will change second slider’s value will be changed with maxPrice’s value, and again we will modify the CSS using this line range.style.right = 100 - (maxPrice / rangeInput[1].max) * 100 + "%"; to move slider according to maxPrice value.
priceInput.forEach(input =>{
    input.addEventListener("input", e =>{
        let minPrice = parseInt(priceInput[0].value),
        maxPrice = parseInt(priceInput[1].value);

        if((maxPrice - minPrice >= priceGap) && maxPrice <= rangeInput[1].max){
            if(e.target.className === "input-min"){
                rangeInput[0].value = minPrice;
                range.style.left = ((minPrice / rangeInput[0].max) * 100) + "%";
            }else{
                rangeInput[1].value = maxPrice;
                range.style.right = 100 - (maxPrice / rangeInput[1].max) * 100 + "%";
            }
        }
    });
});
Customizing Sliders
We have controlled our sliders with input fields, then we have to just control our input fields with slider. For that, we have applied the same logic as above. Now we have added forEach to access both sliders, and we applied event listener to listen to input. So as we move the slider, this event will trigger, in this we have fetched value of sliders in minVal and maxVal variables.
After that, we have added a condition to check maxVal- minVal is less than priceGap, and we have targetted minimum value slider using its class name. Here, we update the slider’s value with maxVal-priceGap, and if the condition is false, then we will update maximum value slider with minVal+priceGap. Then lastly, we will update both priceInputs, and we will again update the value of sliders.
rangeInput.forEach(input =>{
    input.addEventListener("input", e =>{
        let minVal = parseInt(rangeInput[0].value),
        maxVal = parseInt(rangeInput[1].value);

        if((maxVal - minVal) < priceGap){
            if(e.target.className === "range-min"){
                rangeInput[0].value = maxVal - priceGap
            }else{
                rangeInput[1].value = minVal + priceGap;
            }
        }else{
            priceInput[0].value = minVal;
            priceInput[1].value = maxVal;
            range.style.left = ((minVal / rangeInput[0].max) * 100) + "%";
            range.style.right = 100 - (maxVal / rangeInput[1].max) * 100 + "%";
        }
    });
});
Full Source Code to Make Price Range Slider Using JavaScript
index.html
<!DOCTYPE html>
<html lang="en" dir="ltr">
  <head>
    <meta charset="utf-8">
    <title>Price Range Slider</title>
    <link rel="stylesheet" href="style.css">
    <meta name="viewport" content="width=device-width, initial-scale=1.0">
  </head>
  <body>
    <div class="wrapper">
      <header>
        <h2>Price Range</h2>
        <p>Use slider or enter min and max price</p>
      </header>
      <div class="price-input">
        <div class="field">
          <span>Min</span>
          <input type="number" class="input-min" value="2500">
        </div>
        <div class="separator">-</div>
        <div class="field">
          <span>Max</span>
          <input type="number" class="input-max" value="7500">
        </div>
      </div>
      <div class="slider">
        <div class="progress"></div>
      </div>
      <div class="range-input">
        <input type="range" class="range-min" min="0" max="10000" value="2500" step="100">
        <input type="range" class="range-max" min="0" max="10000" value="7500" step="100">
      </div>
    </div>

    <script src="script.js"></script>

  </body>
</html>
style.css
/* Import Google Font - Poppins */
@import url('https://fonts.googleapis.com/css2?family=Poppins:wght@400;500;600;700&display=swap');
*{
  margin: 0;
  padding: 0;
  box-sizing: border-box;
  font-family: 'Poppins', sans-serif;
}
body{
  display: flex;
  align-items: center;
  justify-content: center;
  min-height: 100vh;
  background: #17A2B8;
}
::selection{
  color: #fff;
  background: #17A2B8;
}
.wrapper{
  width: 400px;
  background: #fff;
  border-radius: 10px;
  padding: 20px 25px 40px;
  box-shadow: 0 12px 35px rgba(0,0,0,0.1);
}
header h2{
  font-size: 24px;
  font-weight: 600;
}
header p{
  margin-top: 5px;
  font-size: 16px;
}
.price-input{
  width: 100%;
  display: flex;
  margin: 30px 0 35px;
}
.price-input .field{
  display: flex;
  width: 100%;
  height: 45px;
  align-items: center;
}
.field input{
  width: 100%;
  height: 100%;
  outline: none;
  font-size: 19px;
  margin-left: 12px;
  border-radius: 5px;
  text-align: center;
  border: 1px solid #999;
  -moz-appearance: textfield;
}
input[type="number"]::-webkit-outer-spin-button,
input[type="number"]::-webkit-inner-spin-button {
  -webkit-appearance: none;
}
.price-input .separator{
  width: 130px;
  display: flex;
  font-size: 19px;
  align-items: center;
  justify-content: center;
}
.slider{
  height: 5px;
  position: relative;
  background: #ddd;
  border-radius: 5px;
}
.slider .progress{
  height: 100%;
  left: 25%;
  right: 25%;
  position: absolute;
  border-radius: 5px;
  background: #17A2B8;
}
.range-input{
  position: relative;
}
.range-input input{
  position: absolute;
  width: 100%;
  height: 5px;
  top: -5px;
  background: none;
  pointer-events: none;
  -webkit-appearance: none;
  -moz-appearance: none;
}
input[type="range"]::-webkit-slider-thumb{
  height: 17px;
  width: 17px;
  border-radius: 50%;
  background: #17A2B8;
  pointer-events: auto;
  -webkit-appearance: none;
  box-shadow: 0 0 6px rgba(0,0,0,0.05);
}
input[type="range"]::-moz-range-thumb{
  height: 17px;
  width: 17px;
  border: none;
  border-radius: 50%;
  background: #17A2B8;
  pointer-events: auto;
  -moz-appearance: none;
  box-shadow: 0 0 6px rgba(0,0,0,0.05);
}
script.js
const rangeInput = document.querySelectorAll(".range-input input"),
priceInput = document.querySelectorAll(".price-input input"),
range = document.querySelector(".slider .progress");
let priceGap = 1000;

priceInput.forEach(input =>{
    input.addEventListener("input", e =>{
        let minPrice = parseInt(priceInput[0].value),
        maxPrice = parseInt(priceInput[1].value);

        if((maxPrice - minPrice >= priceGap) && maxPrice <= rangeInput[1].max){
            if(e.target.className === "input-min"){
                rangeInput[0].value = minPrice;
                range.style.left = ((minPrice / rangeInput[0].max) * 100) + "%";
            }else{
                rangeInput[1].value = maxPrice;
                range.style.right = 100 - (maxPrice / rangeInput[1].max) * 100 + "%";
            }
        }
    });
});

rangeInput.forEach(input =>{
    input.addEventListener("input", e =>{
        let minVal = parseInt(rangeInput[0].value),
        maxVal = parseInt(rangeInput[1].value);

        if((maxVal - minVal) < priceGap){
            if(e.target.className === "range-min"){
                rangeInput[0].value = maxVal - priceGap
            }else{
                rangeInput[1].value = minVal + priceGap;
            }
        }else{
            priceInput[0].value = minVal;
            priceInput[1].value = maxVal;
            range.style.left = ((minVal / rangeInput[0].max) * 100) + "%";
            range.style.right = 100 - (maxVal / rangeInput[1].max) * 100 + "%";
        }
    });
});Check out video reference of Price Range Slider:


