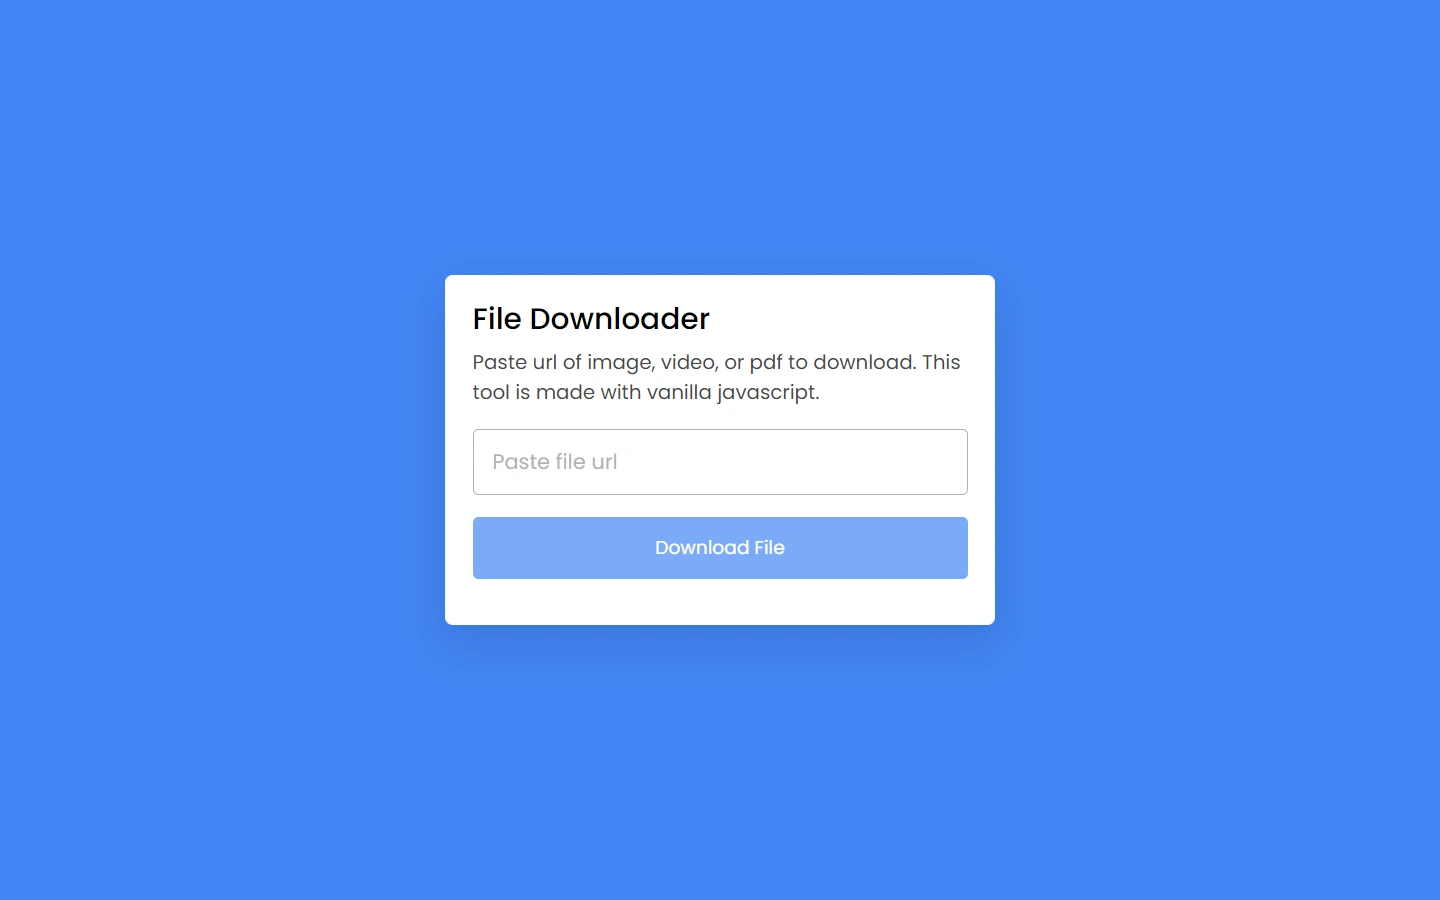
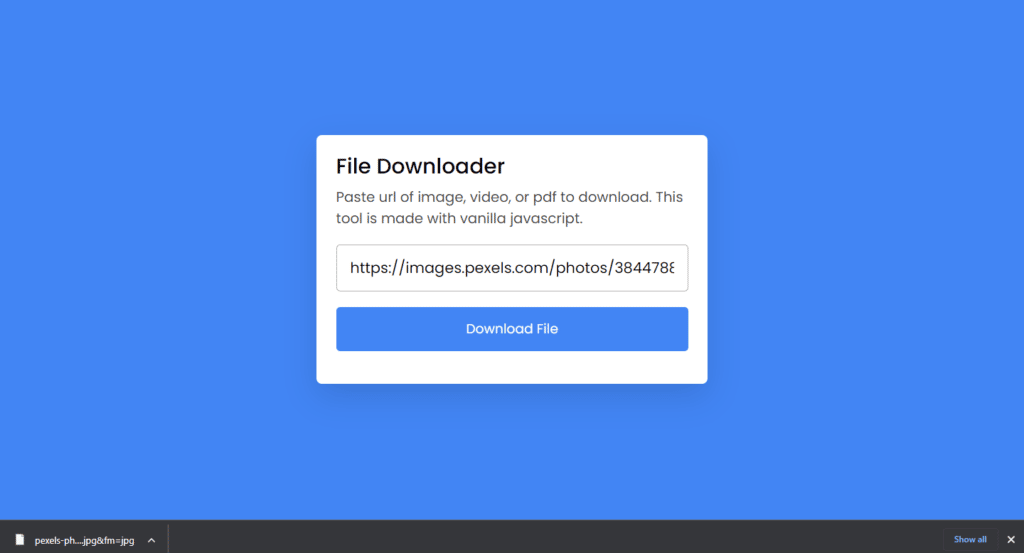
In this article, we will create file downloader using JavaScript. Basically, we will create a file downloader using JavaScript. In this we will add a URL of file like image, document, video etc. and as soon we click on provided button the file will download.
We will also use blob here, which simply helps us to create such kind of project. This will be a great and beginner-friendly project. So let’s make it step-by-step.
Pre-requisites to Make File Downloader Using JavaScript
- Basic Knowledge of HTML.
- Basic Knowledge of CSS.
- Basic Knowledge of JavaScript.
Creating HTML Skeleton
For this project, we need to basically three files. First will be our index.html, in this we will add our elements, and you can simply say we will create the skeleton of the project using HTML file. Then for designing purpose we will be adding our style.css file, with this we will add some styles to our HTML, this is going to be purely based on you, like you can customize it any way. And lastly, our script.js file, this will be our main file because we will add functionality so that we can download the file using the JavaScript file.
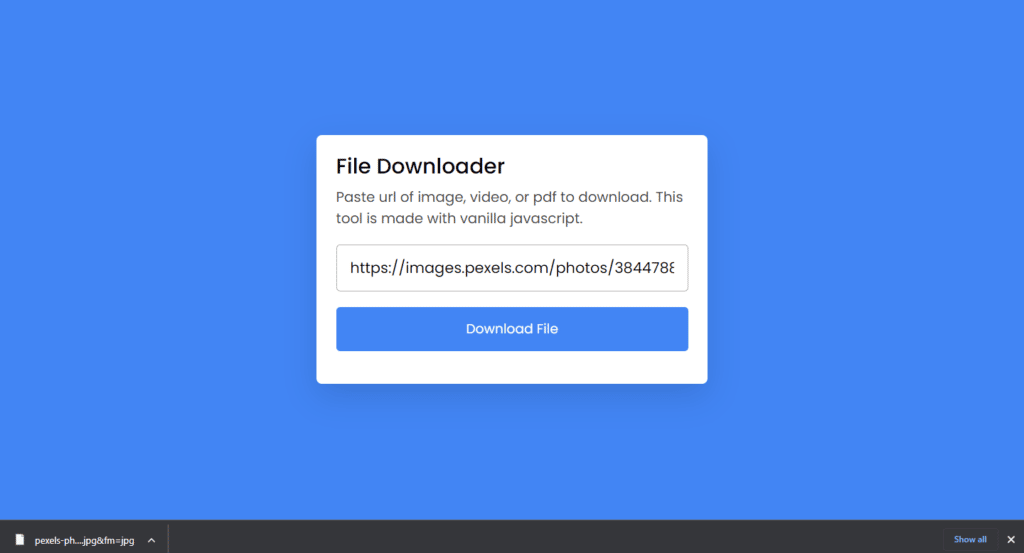
Now in HTML, we have added a wrapper <div>, in which we have added a header with some text. Then we have to add a form, in which we have added a button and input field. So this is it for our HTML.
<!DOCTYPE html>
<html lang="en" dir="ltr">
  <head>
    <meta charset="utf-8">
    <title>File Downloader in JavaScript</title>
    <link rel="stylesheet" href="style.css">
    <meta name="viewport" content="width=device-width, initial-scale=1.0">
  </head>
  <body>
    <div class="wrapper">
      <header>
        <h1>File Downloader</h1>
        <p>Paste url of image, video, or pdf to download. This tool is made with vanilla javascript.</p>
      </header>
      <form action="#">
        <input type="url" placeholder="Paste file url" required>
        <button>Download File</button>
      </form>
    </div>

    <script src="script.js"></script>

  </body>
</html>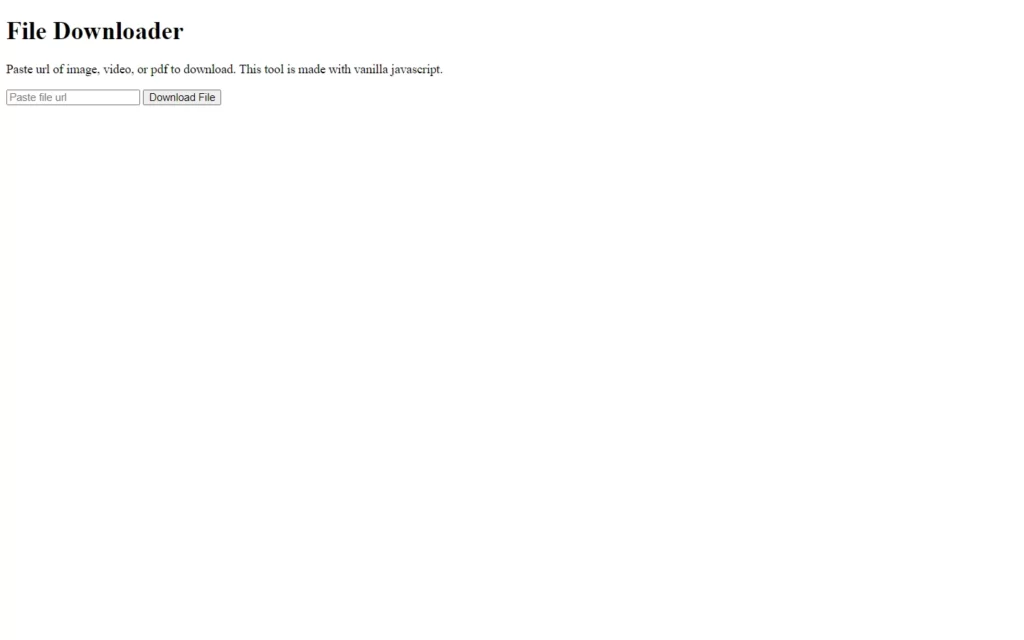
Customizing And Styling Our Project
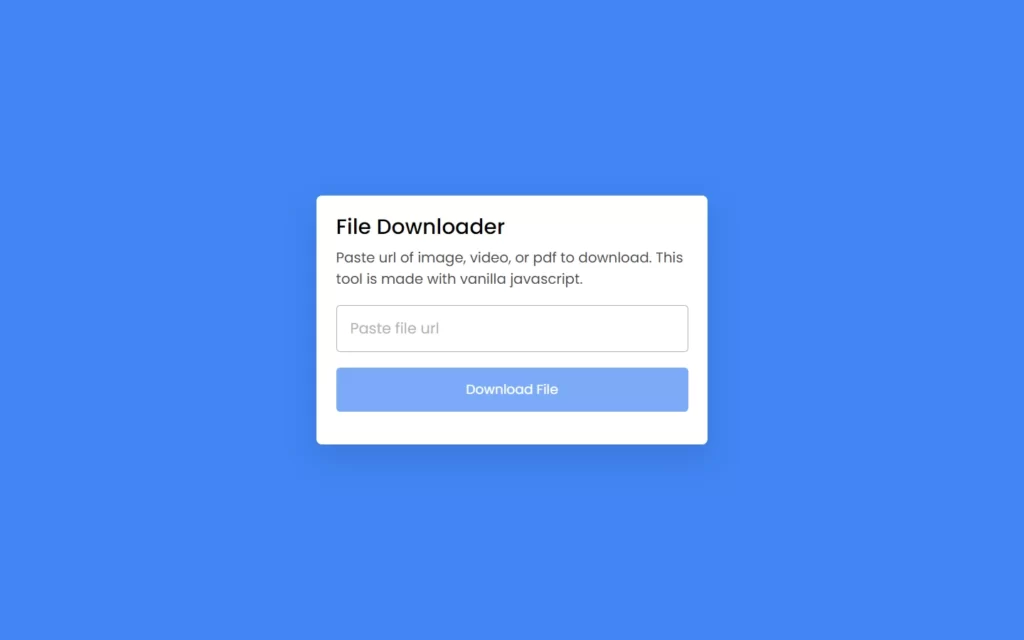
So after adding the basic elements which is actually perfect, but we need to add some CSS styling so that our project looks a little bit good. For that we just added some background color, added a font family, and did some customizations to our elements as well as we centered our project, added some border, color, transitions etc. to make the project interactive. CSS styling is purely depending on the developer to give more interactive look, so we won’t discuss much about it.
All source code will be provided below, so you can simply copy and paste it.
/* Import Google Font - Poppins */
@import url('https://fonts.googleapis.com/css2?family=Poppins:wght@400;500;600;700&display=swap');
*{
  margin: 0;
  padding: 0;
  box-sizing: border-box;
  font-family: 'Poppins', sans-serif;
}
body{
  display: flex;
  padding: 0 10px;
  align-items: center;
  justify-content: center;
  min-height: 100vh;
  background: #4285F4;
}
.wrapper{
  max-width: 500px;
  background: #fff;
  border-radius: 7px;
  padding: 20px 25px 15px;
  box-shadow: 0 15px 40px rgba(0,0,0,0.12);
}
header h1{
  font-size: 27px;
  font-weight: 500;
}
header p{
  margin-top: 5px;
  font-size: 18px;
  color: #474747;
}
form{
  margin: 20px 0 27px;
}
form input{
  width: 100%;
  height: 60px;
  outline: none;
  padding: 0 17px;
  font-size: 19px;
  border-radius: 5px;
  border: 1px solid #b3b2b2;
  transition: 0.1s ease;
}
form input::placeholder{
  color: #b3b2b2;
}
form input:focus{
  box-shadow: 0 3px 6px rgba(0,0,0,0.13);
}
form button{
  width: 100%;
  border: none;
  opacity: 0.7;
  outline: none;
  color: #fff;
  cursor: pointer;
  font-size: 17px;
  margin-top: 20px;
  padding: 15px 0;
  border-radius: 5px;
  pointer-events: none;
  background: #4285F4;
  transition: opacity 0.15s ease;
}
form input:valid ~ button{
  opacity: 1;
  pointer-events: auto;
}
Adding JS Constant
Now our project is looking beautiful, Now we need to add functionalities in this. So as we know JavaScript is powerful, so we will take help from JS. In JS file, we have added some constants in order to fetch required elements. We have used the document.querySelector() method to fetch the classes of elements to access those elements. We have fetched here input field, and button.
const fileInput = document.querySelector("input"),
downloadBtn = document.querySelector("button");
Adding Functionality to Button
Now in the button we have added an event listener to listen click event. As we hit click on button, in which we have added a method to prevent defaults. Then we have added an inner text, and we have called a function named fetchFile() with given URL as the parameter for function, and in this we will add working logic to download file.
downloadBtn.addEventListener("click", e => {
    e.preventDefault();
    downloadBtn.innerText = "Downloading file...";
    fetchFile(fileInput.value);
});
Defining Logic of Function
Now in this function we have added this line of code fetch(url).then(res => res.blob()).then(file => {} if we use console.log the file here we will get the file size and type of file. In this we have added a variable in which we will add URL which created from object. Then we added a constant aTag with which we will create an anchor tag element.
Now we will use aTag constant to access the URL to download the file. Here, we used tempUrl as href for our anchor tag then we have used download attribute in which we have replaced URL with some kind of pattern it is also known as regular expression which allows to identify the pattern. Now we have added a click method, so the file will get download as soon this click method gets called. Then we have revoked our object once the file starts to download and finally we will remove the aTag.
After this we have added an exceptional catch when file won’t get download.
function fetchFile(url) {
    fetch(url).then(res => res.blob()).then(file => {
        let tempUrl = URL.createObjectURL(file);
        const aTag = document.createElement("a");
        aTag.href = tempUrl;
        aTag.download = url.replace(/^.*[\\\/]/, '');
        document.body.appendChild(aTag);
        aTag.click();
        downloadBtn.innerText = "Download File";
        URL.revokeObjectURL(tempUrl);
        aTag.remove();
    }).catch(() => {
        alert("Failed to download file!");
        downloadBtn.innerText = "Download File";
    });
}
Full Source Code to make File Downloader Using JavaScript
index.html
<!DOCTYPE html>
<html lang="en" dir="ltr">
  <head>
    <meta charset="utf-8">
    <title>File Downloader in JavaScript</title>
    <link rel="stylesheet" href="style.css">
    <meta name="viewport" content="width=device-width, initial-scale=1.0">
  </head>
  <body>
    <div class="wrapper">
      <header>
        <h1>File Downloader</h1>
        <p>Paste url of image, video, or pdf to download. This tool is made with vanilla javascript.</p>
      </header>
      <form action="#">
        <input type="url" placeholder="Paste file url" required>
        <button>Download File</button>
      </form>
    </div>

    <script src="script.js"></script>

  </body>
</html>
style.css
/* Import Google Font - Poppins */
@import url('https://fonts.googleapis.com/css2?family=Poppins:wght@400;500;600;700&display=swap');
*{
  margin: 0;
  padding: 0;
  box-sizing: border-box;
  font-family: 'Poppins', sans-serif;
}
body{
  display: flex;
  padding: 0 10px;
  align-items: center;
  justify-content: center;
  min-height: 100vh;
  background: #4285F4;
}
.wrapper{
  max-width: 500px;
  background: #fff;
  border-radius: 7px;
  padding: 20px 25px 15px;
  box-shadow: 0 15px 40px rgba(0,0,0,0.12);
}
header h1{
  font-size: 27px;
  font-weight: 500;
}
header p{
  margin-top: 5px;
  font-size: 18px;
  color: #474747;
}
form{
  margin: 20px 0 27px;
}
form input{
  width: 100%;
  height: 60px;
  outline: none;
  padding: 0 17px;
  font-size: 19px;
  border-radius: 5px;
  border: 1px solid #b3b2b2;
  transition: 0.1s ease;
}
form input::placeholder{
  color: #b3b2b2;
}
form input:focus{
  box-shadow: 0 3px 6px rgba(0,0,0,0.13);
}
form button{
  width: 100%;
  border: none;
  opacity: 0.7;
  outline: none;
  color: #fff;
  cursor: pointer;
  font-size: 17px;
  margin-top: 20px;
  padding: 15px 0;
  border-radius: 5px;
  pointer-events: none;
  background: #4285F4;
  transition: opacity 0.15s ease;
}
form input:valid ~ button{
  opacity: 1;
  pointer-events: auto;
}
script.js
const fileInput = document.querySelector("input"),
downloadBtn = document.querySelector("button");

downloadBtn.addEventListener("click", e => {
    e.preventDefault();
    downloadBtn.innerText = "Downloading file...";
    fetchFile(fileInput.value);
});

function fetchFile(url) {
    fetch(url).then(res => res.blob()).then(file => {
        let tempUrl = URL.createObjectURL(file);
        const aTag = document.createElement("a");
        aTag.href = tempUrl;
        aTag.download = url.replace(/^.*[\\\/]/, '');
        document.body.appendChild(aTag);
        aTag.click();
        downloadBtn.innerText = "Download File";
        URL.revokeObjectURL(tempUrl);
        aTag.remove();
    }).catch(() => {
        alert("Failed to download file!");
        downloadBtn.innerText = "Download File";
    });
}
Output of File Downloader Using JavaScript
Check out awesome video reference of File Downloader Using JavaScript here:
