


In this article, we are going to make a calendar with dark mode and animation using HTML, CSS and JavaScript. It will be a simple calendar, but we also want to add some animation and dark mode. We can do this thing with API as well which will make this project pretty easy to do, but we will do it with the scratch without any API or something.
Pre-requisites to Make Calendar With Dark Mode and Animation Using JavaScript
Before we jump into the coding, you should have a minimum these requirements:
- Good knowledge of HTML.
- Good knowledge of CSS.
- Good knowledge of JavaScript.
Creating Basic Skeleton of Calendar
<!DOCTYPE html>
<html lang="en">
<head>
<meta charset="UTF-8">
<meta name="viewport" content="width=device-width, initial-scale=1.0">
<title>
Calendar
</title>
<!-- <link rel="stylesheet" href="app.css"> -->
</head>
<body class="light">
<div class="calendar">
<div class="calendar-header">
<span class="month-picker" id="month-picker">July</span>
<div class="year-picker">
<span class="year-change" id="prev-year">
<pre><</pre>
</span>
<span id="year">2022</span>
<span class="year-change" id="next-year">
<pre>></pre>
</span>
</div>
</div>
<div class="calendar-body">
<div class="calendar-week-day">
<div>Sun</div>
<div>Mon</div>
<div>Tue</div>
<div>Wed</div>
<div>Thu</div>
<div>Fri</div>
<div>Sat</div>
</div>
<div class="calendar-days">
<div>1</div>
<div>2</div>
<div>3</div>
<div>4</div>
<div>5</div>
<div>6</div>
<div>7</div>
<div>8</div>
<div>9</div>
<div>10</div>
</div>
</div>
<div class="calendar-footer">
<div class="toggle">
<span>Dark Mode</span>
<div class="dark-mode-switch">
<div class="dark-mode-switch-ident"></div>
</div>
</div>
</div>
<div class="month-list"></div>
</div>
<!-- <script src="app.js"></script> -->
</body>
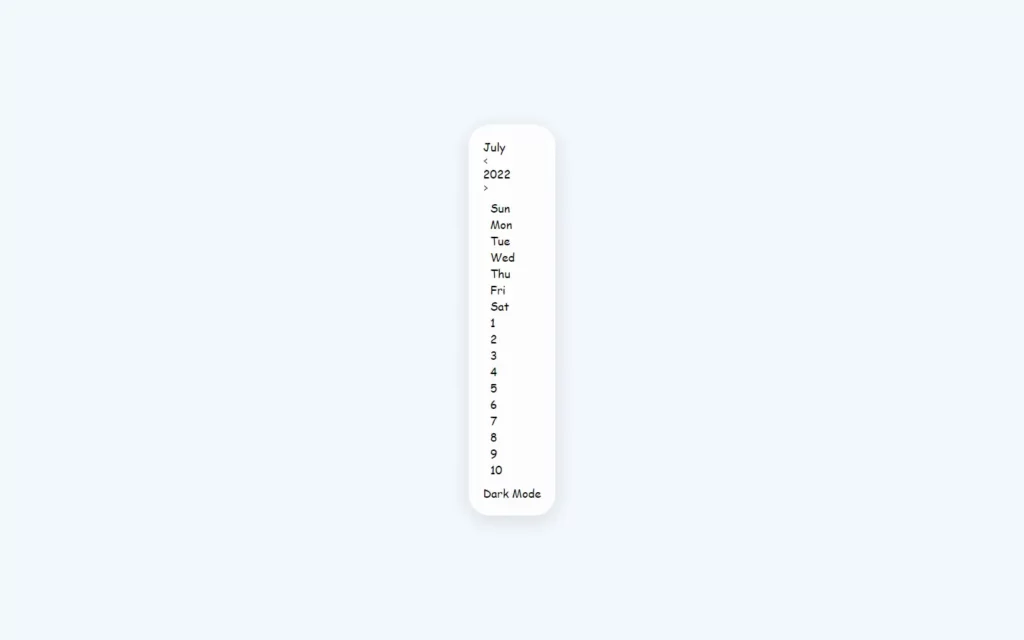
</html>First of all, we will create a calendar skeleton in HTML file. So we have basic calendar components like calendar header, calendar body and calendar footer. In header part we will have month picker, year picker, and previous and next button to change year. In body part, we will have our week days and dates, for now we have some numbers for testing purpose we will remove it later on. Now for footer part, we have here a button to switch in dark mode.

Setting up Default CSS For Calendar With Dark Mode
:root {
--dark-body: #4d4c5a;
--dark-main: #141529;
--dark-second: #79788c;
--dark-hover: #323048;
--dark-text: #f8fbff;
--light-body: #f3f8fe;
--light-main: #fdfdfd;
--light-second: #c3c2c8;
--light-hover: #edf0f5;
--light-text: #151426;
--blue: #0000ff;
--white: #fff;
--shadow: rgba(100, 100, 111, 0.2) 0px 7px 29px 0px;
--font-family: cursive;
}
.dark {
--bg-body: var(--dark-body);
--bg-main: var(--dark-main);
--bg-second: var(--dark-second);
--color-hover: var(--dark-hover);
--color-txt: var(--dark-text);
}
.light {
--bg-body: var(--light-body);
--bg-main: var(--light-main);
--bg-second: var(--light-second);
--color-hover: var(--light-hover);
--color-txt: var(--light-text);
}
* {
padding: 0;
margin: 0;
box-sizing: border-box;
}
html,
body {
height: 100vh;
display: grid;
place-items: center;
font-family: var(--font-family);
background-color: var(--bg-body);
}
.calendar {
height: max-content;
width: max-content;
background-color: var(--bg-main);
border-radius: 30px;
padding: 20px;
position: relative;
overflow: hidden;
}
.light .calendar {
box-shadow: var(--shadow);
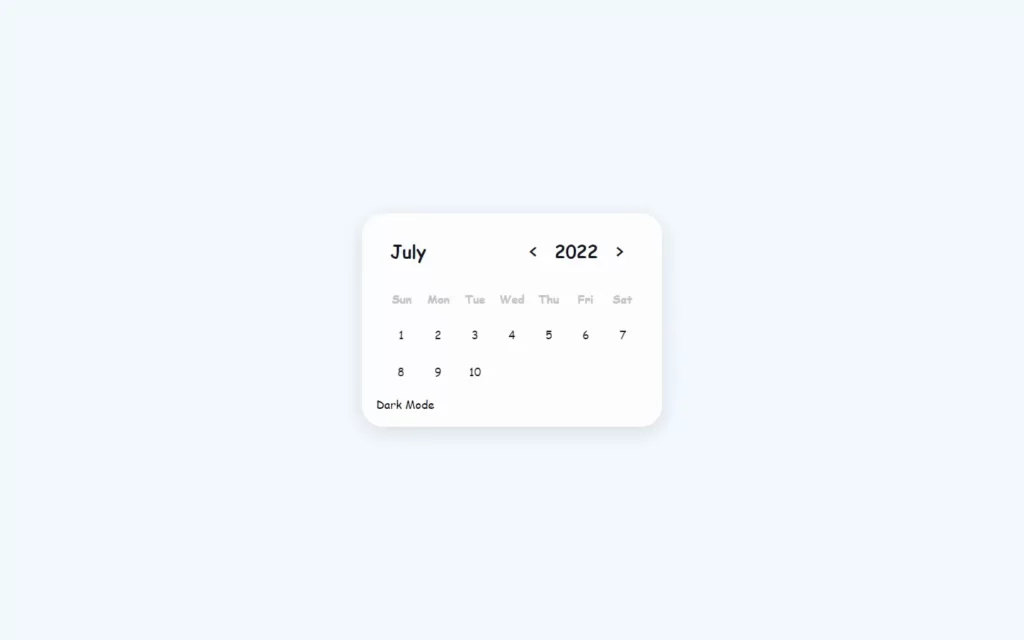
}Now in CSS part, we will first declare some colors which are going to be used in whole CSS part. After that, we need to remove the default margin and padding, then we have placed the calendar in the middle of the window using place-item property.
After that, we have assigned calendar size as much our HTML body has, with max-content. Here we gave position to relative because we don’t have date right now. So if we make it absolute than it won’t we good. And also we provided overflow to hidden so content of calendar won’t show outside the body, Also we have given some shadow.
Customizing Header Part of Calendar
.calendar-header {
    display: flex;
    justify-content: space-between;
    align-items: center;
    font-size: 25px;
    font-weight: 600;
    color: var(--color-txt);
    padding: 10px;
}
.month-picker {
    padding: 5px 10px;
    border-radius: 10px;
    cursor: pointer;
}

.month-picker:hover {
    background-color: var(--color-hover);
}

.year-picker {
    display: flex;
    align-items: center;
}

.year-change {
    height: 40px;
    width: 40px;
    border-radius: 50%;
    display: grid;
    place-items: center;
    margin: 0 10px;
    cursor: pointer;
}

.year-change:hover {
    background-color: var(--color-hover);
}
Now, In the header part, we just used some simple CSS styling. We have here added font family to customize the fonts in calendar, and we have adjusted height and width of month and year fonts. Also, we have added hovering effect on month, buttons for previous and next year we just adjusted its position right next to year, which have some hovering effects.

Customizing Body Part of Calendar
.calendar-week-day {
    height: 50px;
    display: grid;
    grid-template-columns: repeat(7, 1fr);
    font-weight: 600;
}

.calendar-week-day div {
    display: grid;
    place-items: center;
    color: var(--bg-second);
}

.calendar-days {
    display: grid;
    grid-template-columns: repeat(7, 1fr);
    gap: 2px;
    color: var(--color-txt);
}

.calendar-days div {
    width: 50px;
    height: 50px;
    display: flex;
    align-items: center;
    justify-content: center;
    padding: 5px;
    position: relative;
    cursor: pointer;
    animation: to-top 1s forwards;
}
@keyframes to-top {
    0% {
        transform: translateY(100%);
        opacity: 0;
    }
    100% {
        transform: translateY(0);
        opacity: 1;
    }
}
In body part again, we have adjusted all the elements using simple CSS coding. Here main thing to understand is we have used grid-template-columns property. So this property simply divide the body in the certain amount of given numbers, For example, we want to divide our body part into 7 parts of 1fr size, so this property will be useful here.
Also, here we have given an animation when to our dates when the project loads you will see some animation, we have done this animation using transform: translateY at 0% to 100%. Here, we will get fade-in type animation.
Adding Animation on Dates
This following code is to provide some additional animation to dates when we hover them and hovering out. To perform this animation, we have hard coded the span tags in 1 value to debug we will remove this HTML hard code while we’re working on JavaScript.
.calendar-days div span {
    position: absolute;
}

.calendar-days div:hover span {
    transition: width 0.2s ease-in-out, height 0.2s ease-in-out;
}

.calendar-days div span:nth-child(1),
.calendar-days div span:nth-child(3) {
    width: 2px;
    height: 0;
    background-color: var(--color-txt);
}

.calendar-days div:hover span:nth-child(1),
.calendar-days div:hover span:nth-child(3) {
    height: 100%;
}

.calendar-days div span:nth-child(1) {
    bottom: 0;
    left: 0;
}

.calendar-days div span:nth-child(3) {
    top: 0;
    right: 0;
}

.calendar-days div span:nth-child(2),
.calendar-days div span:nth-child(4) {
    width: 0;
    height: 2px;
    background-color: var(--color-txt);
}

.calendar-days div:hover span:nth-child(2),
.calendar-days div:hover span:nth-child(4) {
    width: 100%;
}

.calendar-days div span:nth-child(2) {
    top: 0;
    left: 0;
}

.calendar-days div span:nth-child(4) {
    bottom: 0;
    right: 0;
}

.calendar-days div:hover span:nth-child(2) {
    transition-delay: 0.2s;
}

.calendar-days div:hover span:nth-child(3) {
    transition-delay: 0.4s;
}

.calendar-days div:hover span:nth-child(4) {
    transition-delay: 0.6s;
}

.calendar-days div.curr-date,
.calendar-days div.curr-date:hover {
    background-color: var(--blue);
    color: var(--white);
    border-radius: 50%;
}

.calendar-days div.curr-date span {
    display: none;
}
Customizing The Footer of Calendar
.calendar-footer {
    padding: 10px;
    display: flex;
    justify-content: flex-end;
    align-items: center;
}

.toggle {
    display: flex;
}

.toggle span {
    margin-right: 10px;
    color: var(--color-txt);
}

.dark-mode-switch {
    position: relative;
    width: 48px;
    height: 25px;
    border-radius: 14px;
    background-color: var(--bg-second);
    cursor: pointer;
}

.dark-mode-switch-ident {
    width: 21px;
    height: 21px;
    border-radius: 50%;
    background-color: var(--bg-main);
    position: absolute;
    top: 2px;
    left: 2px;
    transition: left 0.2s ease-in-out;
}

.dark .dark-mode-switch .dark-mode-switch-ident {
    top: 2px;
    left: calc(2px + 50%);
}
Now, in the footer part, we just have to customize our dark mode button. For that, we have adjusted toggle button with text with come color and some animation so if we click on toggle button it will give some animations. Here, we have used a calc function to calculate the equation, With the help of this our toggle button will be able to move at left and right side.
Turning on Dark Mode
let dark_mode_toggle = document.querySelector('.dark-mode-switch')
dark_mode_toggle.onclick = () => {
document.querySelector('body').classList.toggle('light')
document.querySelector('body').classList.toggle('dark')
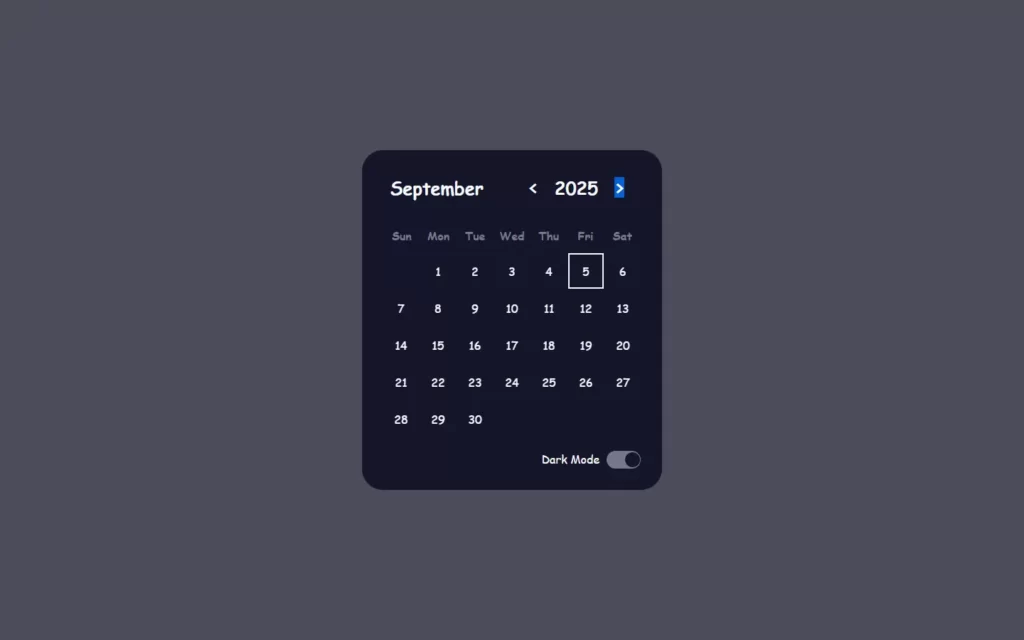
}First thing what we are doing in our javascript is to turning on dark mode, which is pertty easy to do. As we have gave colors on light and dark mode in CSS, So we will just access those colors and styling when toggle button get clicked.

Making Functional Calendar With JavaScript
let calendar = document.querySelector('.calendar')
const month_names = ['January', 'February', 'March', 'April', 'May', 'June', 'July', 'August', 'September', 'October', 'November', 'December']
isLeapYear = (year) => {
return (year % 4 === 0 && year % 100 !== 0 && year % 400 !== 0) || (year % 100 === 0 && year % 400 ===0)
}
getFebDays = (year) => {
return isLeapYear(year) ? 29 : 28
}
generateCalendar = (month, year) => {
let calendar_days = calendar.querySelector('.calendar-days')
let calendar_header_year = calendar.querySelector('#year')
let days_of_month = [31, getFebDays(year), 31, 30, 31, 30, 31, 31, 30, 31, 30, 31]
calendar_days.innerHTML = ''
let currDate = new Date()
if (!month) month = currDate.getMonth()
if (!year) year = currDate.getFullYear()
let curr_month = `${month_names[month]}`
month_picker.innerHTML = curr_month
calendar_header_year.innerHTML = year
// get first day of month
let first_day = new Date(year, month, 1)
for (let i = 0; i <= days_of_month[month] + first_day.getDay() - 1; i++) {
let day = document.createElement('div')
if (i >= first_day.getDay()) {
day.classList.add('calendar-day-hover')
day.innerHTML = i - first_day.getDay() + 1
day.innerHTML += `<span></span>
<span></span>
<span></span>
<span></span>`
if (i - first_day.getDay() + 1 === currDate.getDate() && year === currDate.getFullYear() && month === currDate.getMonth()) {
day.classList.add('curr-date')
}
}
calendar_days.appendChild(day)
}
}
let month_list = calendar.querySelector('.month-list')
month_names.forEach((e, index) => {
let month = document.createElement('div')
month.innerHTML = `<div data-month="${index}">${e}</div>`
month.querySelector('div').onclick = () => {
month_list.classList.remove('show')
curr_month.value = index
generateCalendar(index, curr_year.value)
}
month_list.appendChild(month)
})
let month_picker = calendar.querySelector('#month-picker')
month_picker.onclick = () => {
month_list.classList.add('show')
}
let currDate = new Date()
let curr_month = {value: currDate.getMonth()}
let curr_year = {value: currDate.getFullYear()}
generateCalendar(curr_month.value, curr_year.value)
document.querySelector('#prev-year').onclick = () => {
--curr_year.value
generateCalendar(curr_month.value, curr_year.value)
}
document.querySelector('#next-year').onclick = () => {
++curr_year.value
generateCalendar(curr_month.value, curr_year.value)
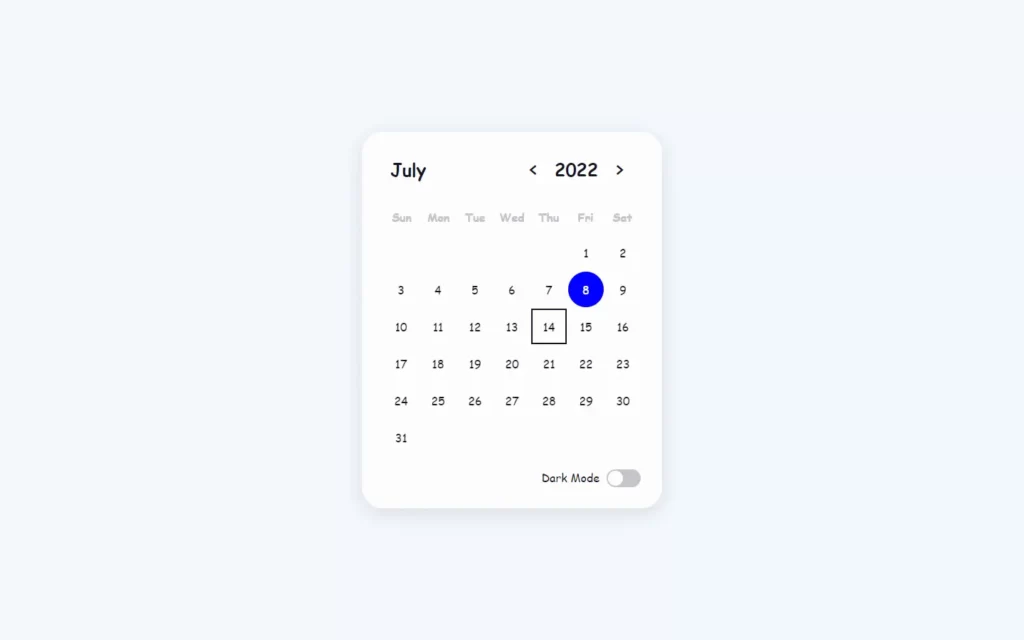
}Firstly, In our JavaScript file, we will access the calendar using querySelector , Then we need have added months name in an array. Now for year, we need to check where it is leap year or not, So we used here some conditions to get leap year status.
Then after, we need to generate our calendar. Firstly we will generate an array for days for each month. Then we have adjusted month and year to get current month and year using getMonth() and getFullYear() .
Now its time to get the first day of the current year and month, For that we have used Date() function. we have assigned Date() object into the first_day variable and with this we have called getDay() to get the date. To print these dates we have used loop till end date of the month, so we are using the appendChild to print these dates on the calendar.
Now for Month picker we need to add some CSS here:
.month-list {
    position: absolute;
    width: 100%;
    height: 100%;
    top: 0;
    left: 0;
    background-color: var(--bg-main);
    padding: 20px;
    grid-template-columns: repeat(3, auto);
    gap: 5px;
    display: grid;
    transform: scale(1.5);
    visibility: hidden;
    pointer-events: none;
}

.month-list.show {
    transform: scale(1);
    visibility: visible;
    pointer-events: visible;
    transition: all 0.2s ease-in-out;
}

.month-list > div {
    display: grid;
    place-items: center;
}

.month-list > div > div {
    width: 100%;
    padding: 5px 20px;
    border-radius: 10px;
    text-align: center;
    cursor: pointer;
    color: var(--color-txt);
}

.month-list > div > div:hover {
    background-color: var(--color-hover);
}
In month picker, we need to expand the month list over the calendar, For that we have just used grid-template-columns property, in which we have exapanded our month list in 3×3 grid and we have usded visibility to hidden, so this picker will be hidden by default. Also we have used some scale to give some animation here. Now we have also added some hovering effect on month and in month list.
Now we have done over CSS part, let’s get back to JS part. we have first added an event listener for onClick event, so if we click on month then function ‘show’ will be called and as we have maintained in css , whole calendar area will be filled with month list.
Then after we have just added month name in the month list using for each loop and month list array. And lastly we are just reducing and increasing number for year as we click on previous and next button, Again we will generate the calendar as the year changes. We will again call the whole logic for curresponding year and month.
Full Source Code for Calendar With Dark Mode And Animation Using HTML, CSS And JavaScript
index.html
<!DOCTYPE html>
<html lang="en">

<head>
    <meta charset="UTF-8">
    <meta name="viewport" content="width=device-width, initial-scale=1.0">
    <title>
        Calendar
    </title>
    <link rel="stylesheet" href="app.css">
</head>

<body class="light">

    <div class="calendar">
        <div class="calendar-header">
            <span class="month-picker" id="month-picker">July</span>
            <div class="year-picker">
                <span class="year-change" id="prev-year">
                    <pre><</pre>
                </span>
                <span id="year">2022</span>
                <span class="year-change" id="next-year">
                    <pre>></pre>
                </span>
            </div>
        </div>
        <div class="calendar-body">
            <div class="calendar-week-day">
                <div>Sun</div>
                <div>Mon</div>
                <div>Tue</div>
                <div>Wed</div>
                <div>Thu</div>
                <div>Fri</div>
                <div>Sat</div>
            </div>
            <div class="calendar-days">
            </div>
        </div>
        <div class="calendar-footer">
            <div class="toggle">
                <span>Dark Mode</span>
                <div class="dark-mode-switch">
                    <div class="dark-mode-switch-ident"></div>
                </div>
            </div>
        </div>
        <div class="month-list"></div>
    </div>

    <script src="app.js"></script>
</body>

</html>
style.css
:root {
    --dark-body: #4d4c5a;
    --dark-main: #141529;
    --dark-second: #79788c;
    --dark-hover: #323048;
    --dark-text: #f8fbff;

    --light-body: #f3f8fe;
    --light-main: #fdfdfd;
    --light-second: #c3c2c8;
    --light-hover: #edf0f5;
    --light-text: #151426;

    --blue: #0000ff;
    --white: #fff;

    --shadow: rgba(100, 100, 111, 0.2) 0px 7px 29px 0px;

    --font-family: cursive;
}

.dark {
    --bg-body: var(--dark-body);
    --bg-main: var(--dark-main);
    --bg-second: var(--dark-second);
    --color-hover: var(--dark-hover);
    --color-txt: var(--dark-text);
}

.light {
    --bg-body: var(--light-body);
    --bg-main: var(--light-main);
    --bg-second: var(--light-second);
    --color-hover: var(--light-hover);
    --color-txt: var(--light-text);
}

* {
    padding: 0;
    margin: 0;
    box-sizing: border-box;
}

html,
body {
    height: 100vh;
    display: grid;
    place-items: center;
    font-family: var(--font-family);
    background-color: var(--bg-body);
}

.calendar {
    height: max-content;
    width: max-content;
    background-color: var(--bg-main);
    border-radius: 30px;
    padding: 20px;
    position: relative;
    overflow: hidden;
    /* transform: scale(1.25); */
}

.light .calendar {
    box-shadow: var(--shadow);
}

.calendar-header {
    display: flex;
    justify-content: space-between;
    align-items: center;
    font-size: 25px;
    font-weight: 600;
    color: var(--color-txt);
    padding: 10px;
}

.calendar-body {
    padding: 10px;
}

.calendar-week-day {
    height: 50px;
    display: grid;
    grid-template-columns: repeat(7, 1fr);
    font-weight: 600;
}

.calendar-week-day div {
    display: grid;
    place-items: center;
    color: var(--bg-second);
}

.calendar-days {
    display: grid;
    grid-template-columns: repeat(7, 1fr);
    gap: 2px;
    color: var(--color-txt);
}

.calendar-days div {
    width: 50px;
    height: 50px;
    display: flex;
    align-items: center;
    justify-content: center;
    padding: 5px;
    position: relative;
    cursor: pointer;
    animation: to-top 1s forwards;
    /* border-radius: 50%; */
}

.calendar-days div span {
    position: absolute;
}

.calendar-days div:hover span {
    transition: width 0.2s ease-in-out, height 0.2s ease-in-out;
}

.calendar-days div span:nth-child(1),
.calendar-days div span:nth-child(3) {
    width: 2px;
    height: 0;
    background-color: var(--color-txt);
}

.calendar-days div:hover span:nth-child(1),
.calendar-days div:hover span:nth-child(3) {
    height: 100%;
}

.calendar-days div span:nth-child(1) {
    bottom: 0;
    left: 0;
}

.calendar-days div span:nth-child(3) {
    top: 0;
    right: 0;
}

.calendar-days div span:nth-child(2),
.calendar-days div span:nth-child(4) {
    width: 0;
    height: 2px;
    background-color: var(--color-txt);
}

.calendar-days div:hover span:nth-child(2),
.calendar-days div:hover span:nth-child(4) {
    width: 100%;
}

.calendar-days div span:nth-child(2) {
    top: 0;
    left: 0;
}

.calendar-days div span:nth-child(4) {
    bottom: 0;
    right: 0;
}

.calendar-days div:hover span:nth-child(2) {
    transition-delay: 0.2s;
}

.calendar-days div:hover span:nth-child(3) {
    transition-delay: 0.4s;
}

.calendar-days div:hover span:nth-child(4) {
    transition-delay: 0.6s;
}

.calendar-days div.curr-date,
.calendar-days div.curr-date:hover {
    background-color: var(--blue);
    color: var(--white);
    border-radius: 50%;
}

.calendar-days div.curr-date span {
    display: none;
}

.month-picker {
    padding: 5px 10px;
    border-radius: 10px;
    cursor: pointer;
}

.month-picker:hover {
    background-color: var(--color-hover);
}

.year-picker {
    display: flex;
    align-items: center;
}

.year-change {
    height: 40px;
    width: 40px;
    border-radius: 50%;
    display: grid;
    place-items: center;
    margin: 0 10px;
    cursor: pointer;
}

.year-change:hover {
    background-color: var(--color-hover);
}

.calendar-footer {
    padding: 10px;
    display: flex;
    justify-content: flex-end;
    align-items: center;
}

.toggle {
    display: flex;
}

.toggle span {
    margin-right: 10px;
    color: var(--color-txt);
}

.dark-mode-switch {
    position: relative;
    width: 48px;
    height: 25px;
    border-radius: 14px;
    background-color: var(--bg-second);
    cursor: pointer;
}

.dark-mode-switch-ident {
    width: 21px;
    height: 21px;
    border-radius: 50%;
    background-color: var(--bg-main);
    position: absolute;
    top: 2px;
    left: 2px;
    transition: left 0.2s ease-in-out;
}

.dark .dark-mode-switch .dark-mode-switch-ident {
    top: 2px;
    left: calc(2px + 50%);
}

.month-list {
    position: absolute;
    width: 100%;
    height: 100%;
    top: 0;
    left: 0;
    background-color: var(--bg-main);
    padding: 20px;
    grid-template-columns: repeat(3, auto);
    gap: 5px;
    display: grid;
    transform: scale(1.5);
    visibility: hidden;
    pointer-events: none;
}

.month-list.show {
    transform: scale(1);
    visibility: visible;
    pointer-events: visible;
    transition: all 0.2s ease-in-out;
}

.month-list > div {
    display: grid;
    place-items: center;
}

.month-list > div > div {
    width: 100%;
    padding: 5px 20px;
    border-radius: 10px;
    text-align: center;
    cursor: pointer;
    color: var(--color-txt);
}

.month-list > div > div:hover {
    background-color: var(--color-hover);
}

@keyframes to-top {
    0% {
        transform: translateY(100%);
        opacity: 0;
    }
    100% {
        transform: translateY(0);
        opacity: 1;
    }
}
app.js
let calendar = document.querySelector('.calendar')

const month_names = ['January', 'February', 'March', 'April', 'May', 'June', 'July', 'August', 'September', 'October', 'November', 'December']

isLeapYear = (year) => {
    return (year % 4 === 0 && year % 100 !== 0 && year % 400 !== 0) || (year % 100 === 0 && year % 400 ===0)
}

getFebDays = (year) => {
    return isLeapYear(year) ? 29 : 28
}

generateCalendar = (month, year) => {

    let calendar_days = calendar.querySelector('.calendar-days')
    let calendar_header_year = calendar.querySelector('#year')

    let days_of_month = [31, getFebDays(year), 31, 30, 31, 30, 31, 31, 30, 31, 30, 31]

    calendar_days.innerHTML = ''

    let currDate = new Date()
    if (!month) month = currDate.getMonth()
    if (!year) year = currDate.getFullYear()

    let curr_month = `${month_names[month]}`
    month_picker.innerHTML = curr_month
    calendar_header_year.innerHTML = year

    // get first day of month

    let first_day = new Date(year, month, 1)

    for (let i = 0; i <= days_of_month[month] + first_day.getDay() - 1; i++) {
        let day = document.createElement('div')
        if (i >= first_day.getDay()) {
            day.classList.add('calendar-day-hover')
            day.innerHTML = i - first_day.getDay() + 1
            day.innerHTML += `<span></span>
                            <span></span>
                            <span></span>
                            <span></span>`
            if (i - first_day.getDay() + 1 === currDate.getDate() && year === currDate.getFullYear() && month === currDate.getMonth()) {
                day.classList.add('curr-date')
            }
        }
        calendar_days.appendChild(day)
    }
}

let month_list = calendar.querySelector('.month-list')

month_names.forEach((e, index) => {
    let month = document.createElement('div')
    month.innerHTML = `<div data-month="${index}">${e}</div>`
    month.querySelector('div').onclick = () => {
        month_list.classList.remove('show')
        curr_month.value = index
        generateCalendar(index, curr_year.value)
    }
    month_list.appendChild(month)
})

let month_picker = calendar.querySelector('#month-picker')

month_picker.onclick = () => {
    month_list.classList.add('show')
}

let currDate = new Date()

let curr_month = {value: currDate.getMonth()}
let curr_year = {value: currDate.getFullYear()}

generateCalendar(curr_month.value, curr_year.value)

document.querySelector('#prev-year').onclick = () => {
    --curr_year.value
    generateCalendar(curr_month.value, curr_year.value)
}

document.querySelector('#next-year').onclick = () => {
    ++curr_year.value
    generateCalendar(curr_month.value, curr_year.value)
}

let dark_mode_toggle = document.querySelector('.dark-mode-switch')

dark_mode_toggle.onclick = () => {
    document.querySelector('body').classList.toggle('light')
    document.querySelector('body').classList.toggle('dark')
}
Output of Calendar With Dark Mode


